Analytics, Azure Analysis Services, How to
Creating your first data model in Azure Analysis Services
Posted on
6 min read
Azure Analysis Services is a new preview service in Microsoft Azure where you can host semantic data models. Users in your organization can then connect to your data models using tools like Excel, Power BI and many others to create reports and perform ad-hoc data analysis.
To understand the value of Azure Analysis Services, imagine a scenario where you have data stored in a large database. You want to make that data available to your business users or customers so they can do their own analysis and build their own reports. To do this, one option would be to give those users access to that database. Of course, this option has several drawbacks. The design of that database, including the names of tables and columns may not be easy for a user to understand. They would need to know which tables to query, how those tables should be joined, and other business logic that needs to be applied to get the correct results. They would also need to know a query language like SQL to even get started. Most often this will lead to multiple users reporting the same metrics but with different results.
With Azure Analysis Services, you can encapsulate all the information needed into a semantic model which can be more easily queried by those users in an easy drag-and-drop experience. And you can ensure that all users will see a single version of the truth. Some of the metadata included in the semantic model includes; relationships between tables, friendly table/column names, descriptions, display folders, calculations and row level security.
Once your data is properly modeled for your users to consume, Azure Analysis Services offers additional features to enhance their querying experience. The biggest of which is the option to put the data in an in memory columnar cache which can accelerate queries to sub second performance. This not only improves the query experience but by hitting the cache also reduces the query load on your underlying database.
Ready to give it a try? Follow the steps in the rest of this blog post and you’ll see how easy it is.
Before getting started, you’ll need:
Azure Subscription – Sign up for a free trial.
SQL Server Data Tools – Download the latest version for free.
Power BI Desktop – Download the latest version for free.
Create an Analysis Services server in Azure
1. Go to https://portal.azure.com.
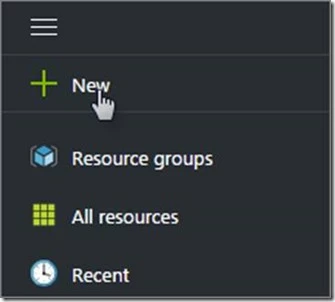
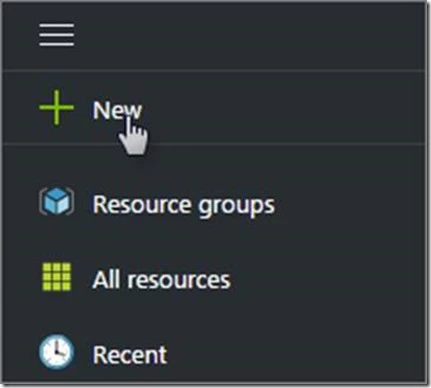
2. In the Menu blade, click New.
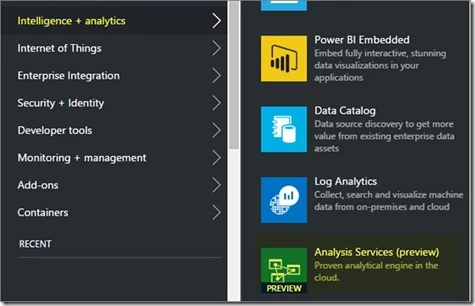
3. Expand Intelligence + Analytics, and then click Analysis Services.
4. In the Analysis Services blade, enter the following and then click Create:
- Server name: Type a unique name.
- Subscription: Select your subscription.
- Resource group: Select Create new, and then type a name for your new resource group.
- Location: This is the Azure datacenter location that hosts the server. Choose a location nearest you.
- Pricing tier: For our simple model, select D1. This is the smallest tier and great for getting started. The larger tiers are differentiated by how much cache and query processing units they have. Cache indicates how much data can be loaded into the cache after it has been compressed. Query processing units, or QPUs, are a sign of how many queries can be supported concurrently. Higher QPUs may mean better performance and allow for a higher concurrency of users.
Now that you’ve created a server, you can build your first model. In the next steps, you’ll use SQL Server Data Tools (SSDT) to create a data model and deploy it to your new server in Azure.
Create a sample data source
Before you can create a data model with SSDT, you’ll need a data source to connect to. Azure Analysis Services supports connecting to many different types of data sources both on-premises and in the cloud. For this post, we’ll use the Adventure Works sample database.
1. In Azure portal, in the Menu blade, click New.
2. Expand Databases, and then click SQL Database.
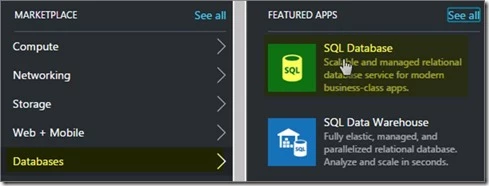
3. In the SQL Database blade, enter the following and then click Create:
- Database name: Type a unique name.
- Subscription: Select your subscription.
- Resource group: Select the same resource group you created for your Analysis Services server.
- Select source: Select Sample (Adventure Works LT).
- Server: Choose a location nearest you.
- Pricing tier: For your sample database, select B.
- Collation: Leave the default, SQL_Latin1_General_CP1_CI_AS.
Now that you’ve created a sample data source, you’ll have some data to connect to when you build your data model.In the next steps, you’ll use SQL Server Data Tools (SSDT) to connect to your new data source, create a data model, and deploy it to your new server in Azure.
Create a data model
To create Analysis Services data models, you’ll use Visual Studio and an extension called SQL Server Data Tools (SSDT).
1. In SSDT, create a new Analysis Services Tabular Project.
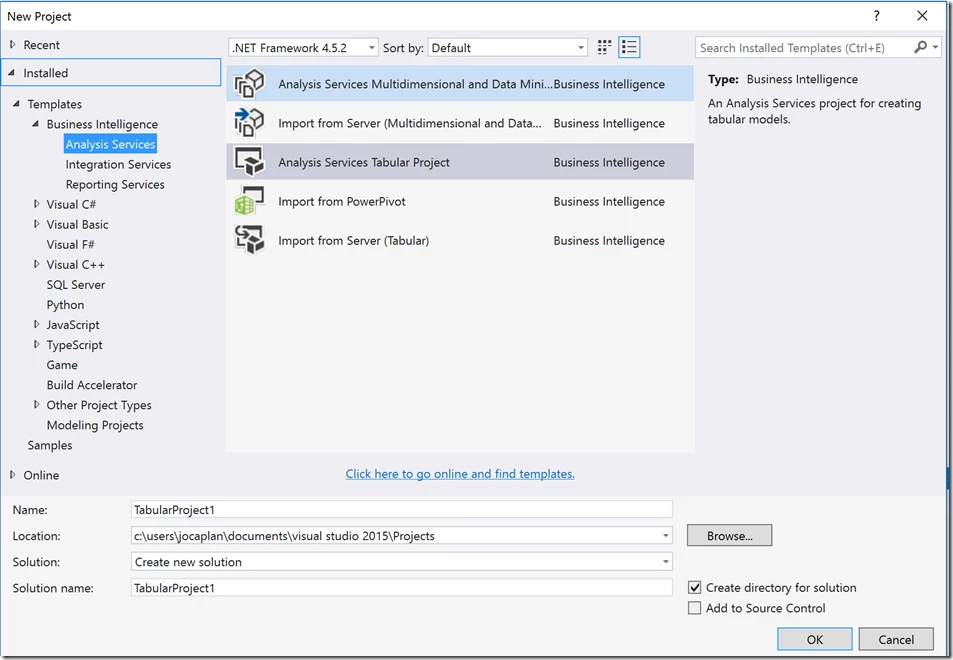
If asked to select a workspace type, select Integrated.
2. Click the Import From Data Source icon on the toolbar at the top of the screen.

3. Select Microsoft SQL Azure as your data source type and click Next.
4. Fill in the connection information for the sample SQL Azure database created earlier and click Next.
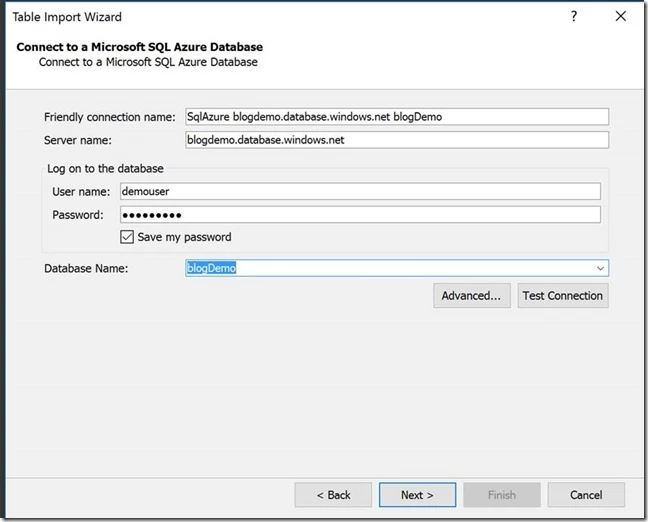
- Server Name: Name of SQL Azure server to connect to.
- User Name: Name of the user which will be used to login to the server.
- Password: Password for the account.
- Database Name: Name of the SQL database to connect to.
Note: If using SQL Azure ensure that you have allowed your IP address access through the firewall. Also, ensure that “Allow access to Azure Services” is set to “on” for the firewall.
5. Select Service Account for the impersonation mode and click Next.
6. Select the tables you wish to import into cache and click Finish:
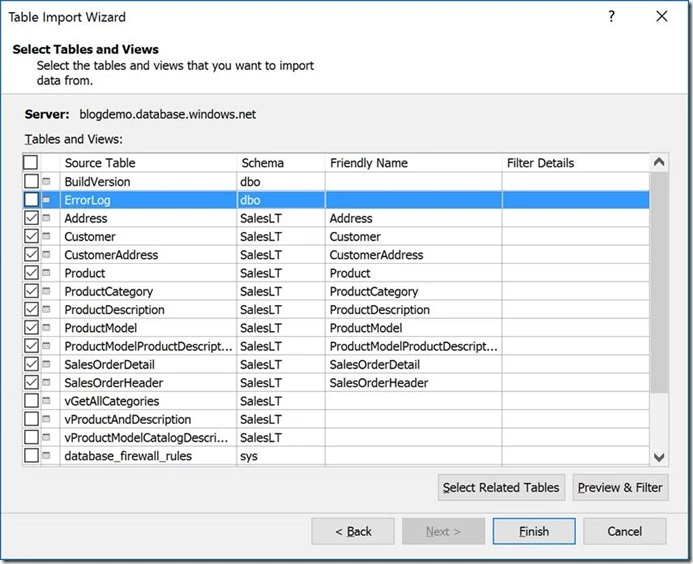
- At this step, you can optionally provide a friendly name for each table. For large tables, which may not fit into cache, you can also specify a filter expression to reduce the number of rows. When complete, click next.
- Data will now be read from the database and pulled into a local cache within Visual Studio.
- Once loading is complete, you will have your first model created and will be able to see each table and the data within them. You can also switch to a diagram view by clicking the little diagram option at the bottom right of the screen:
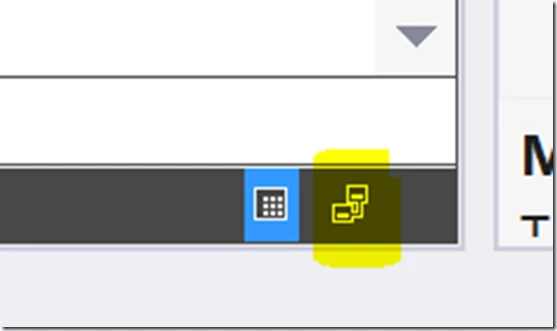
The diagram view makes it really easy to see all of the tables and the relationships between them.
Improving the model
Now that your basic model is built, you could start querying it now or you could enhance it further by using more of the available modeling features. Some of these features include:
- Create or edit relationships. You can add, remove or change relationships between tables by going to the diagram view and dragging a line between two columns in different tables. Once tables are joined together, they can automatically be queried together when a user selects columns from both tables.
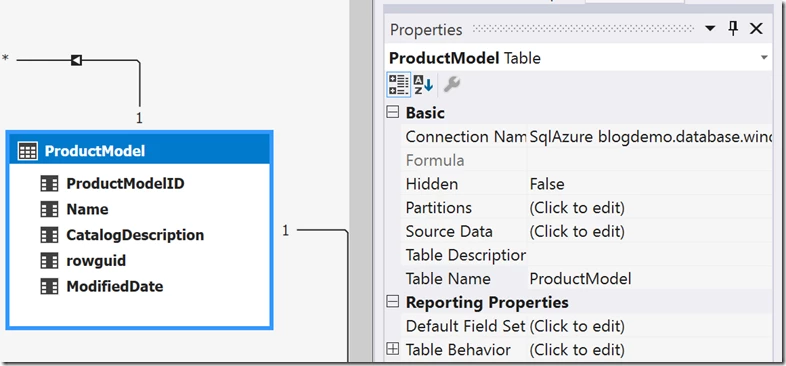
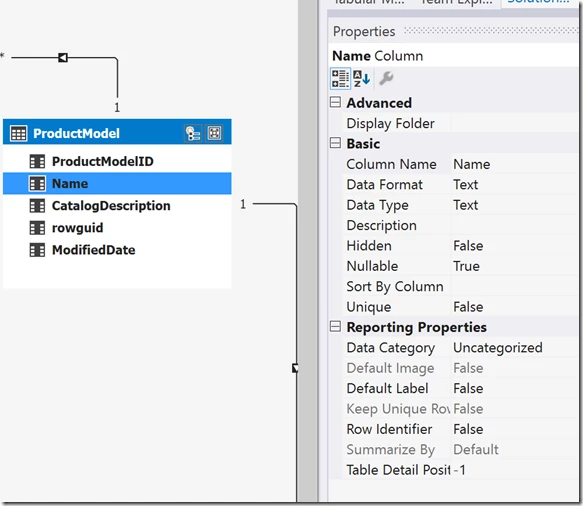
- Edit properties for a table or column. You can update multiple properties for tables and columns by clicking on them and updating the values in the properties pane.
- Add more business logic to the model by creating calculations and measures.
Deploy
Once your model is complete, you can now deploy it to the Azure AS server which you created in the first step. This can be done with the following steps:
1. Copy your Azure Analysis Services server name for the Azure portal. This can be found at the top of the overview section of your server.
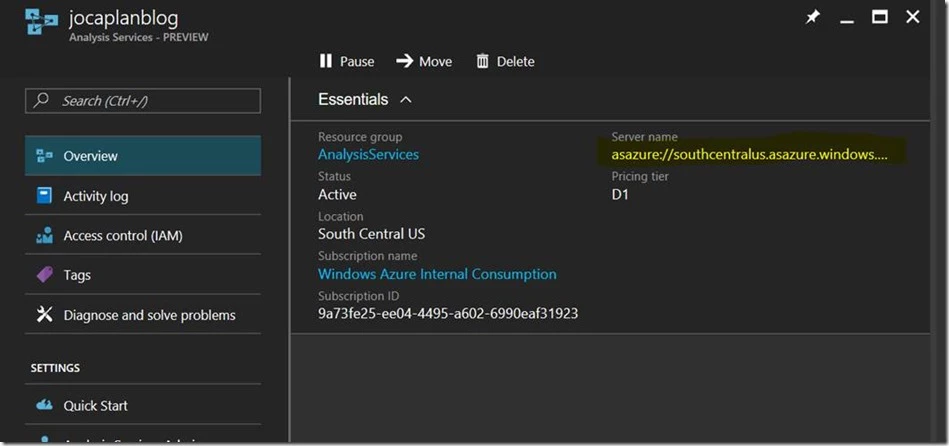
2. In the solution explorer in Visual Studio, right click on the project and click properties.
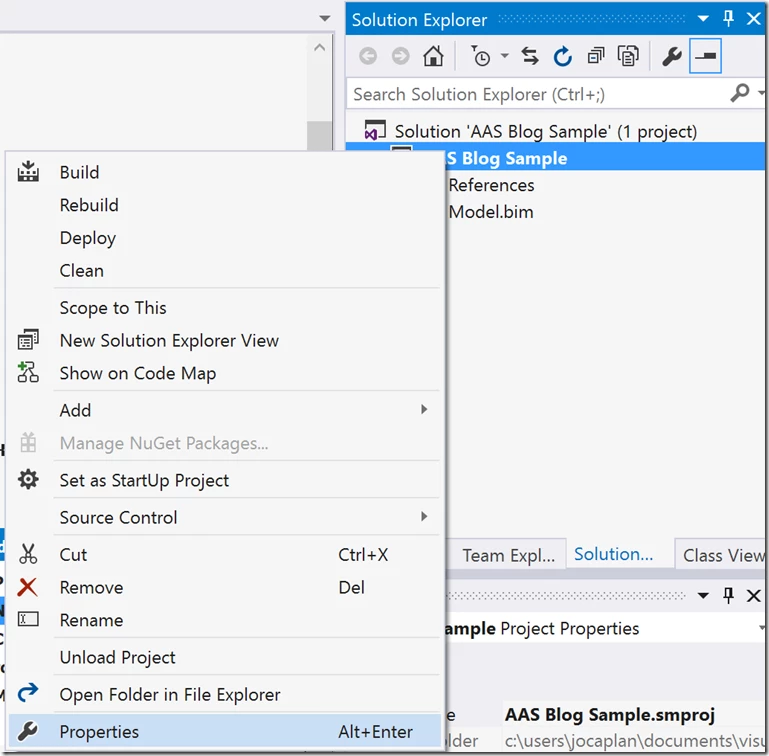
3. Change the deployment server to the name of your Azure AS server and click OK.
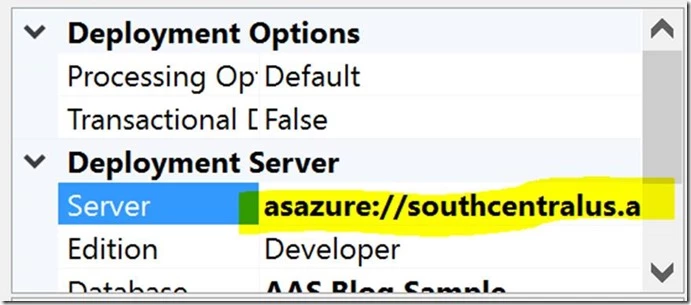
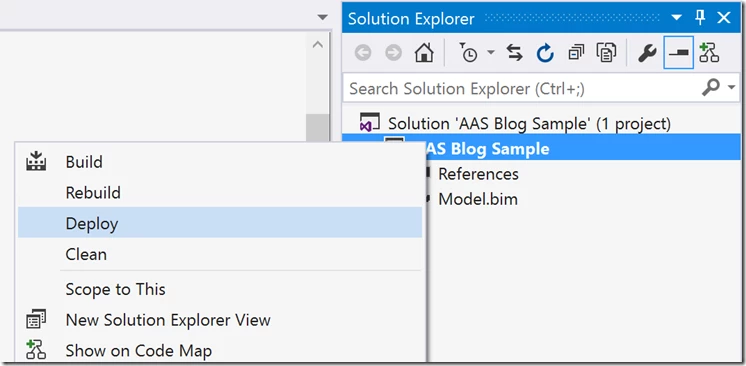
4. Right click the project name again, but this time click Deploy.
Connect
Now that you model has been creating you can connect with it through tools like the Power BI Desktop or Excel.
Power BI Desktop
If you don’t already have the Power BI Desktop, you can download it for free.
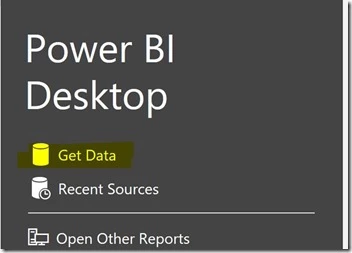
1. Open the Power BI Desktop
2. Click Get Data.
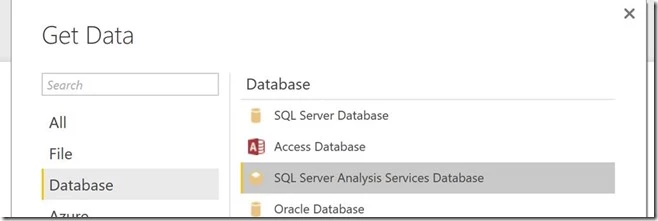
3. Select Databases/SQL Server Analysis Services and then click connect.
4. Enter your Azure AS server name and click OK.
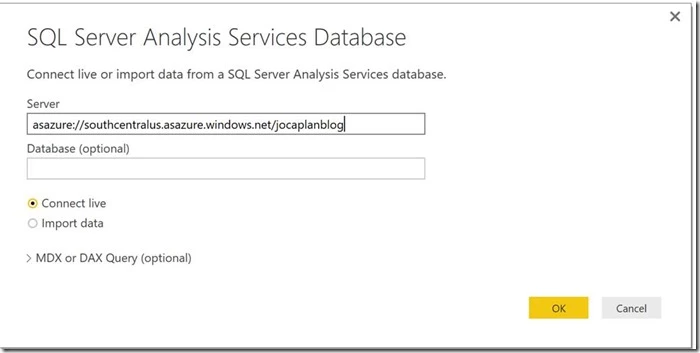
5. On the Navigator screen, select your model and click OK.

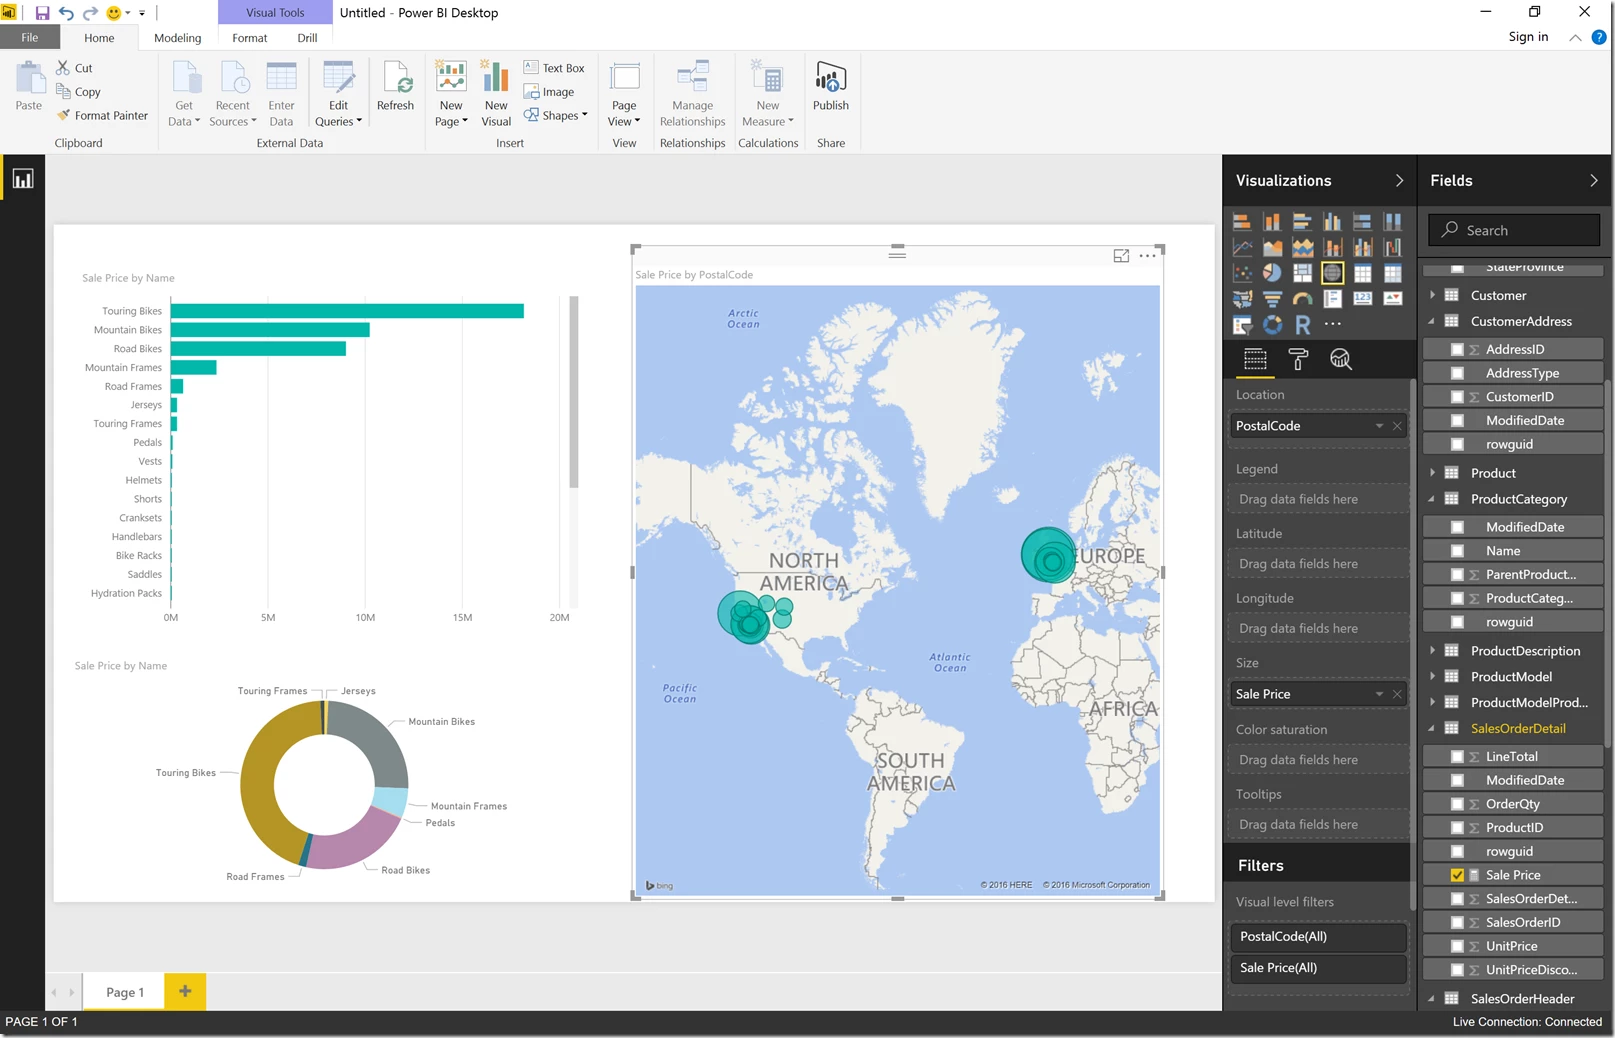
You will now see your model displayed in the field list on the side. You can drag and drop the different fields on to your page to build out interactive visuals.
Excel
Learn more about connecting through Excel.
Learn more about Azure Analysis Services.
