Azure Monitor, DevOps, Management and Governance
Creating an Application Insights Web Test and Alert Programmatically
Posted on
4 min read
Availability checking and Alerting are features of Application Insights. Application Insight’s web tests will ping your application from multiple locations to check availability and then alert you when it is down. In today’s highly connected world the cost of an outage is very high and visible: users expect 100% availability and high performance. You can manually set up web tests in the Azure Portal. But if you deploy your application automatically, manual configuration may not be an option. In this post I will explain how to deploy a web test automatically.
We’ll create a template from a manually-created web test, and then use it to automate the creation of future web tests. So we’ll start by creating a web test manually.
Creating a web test
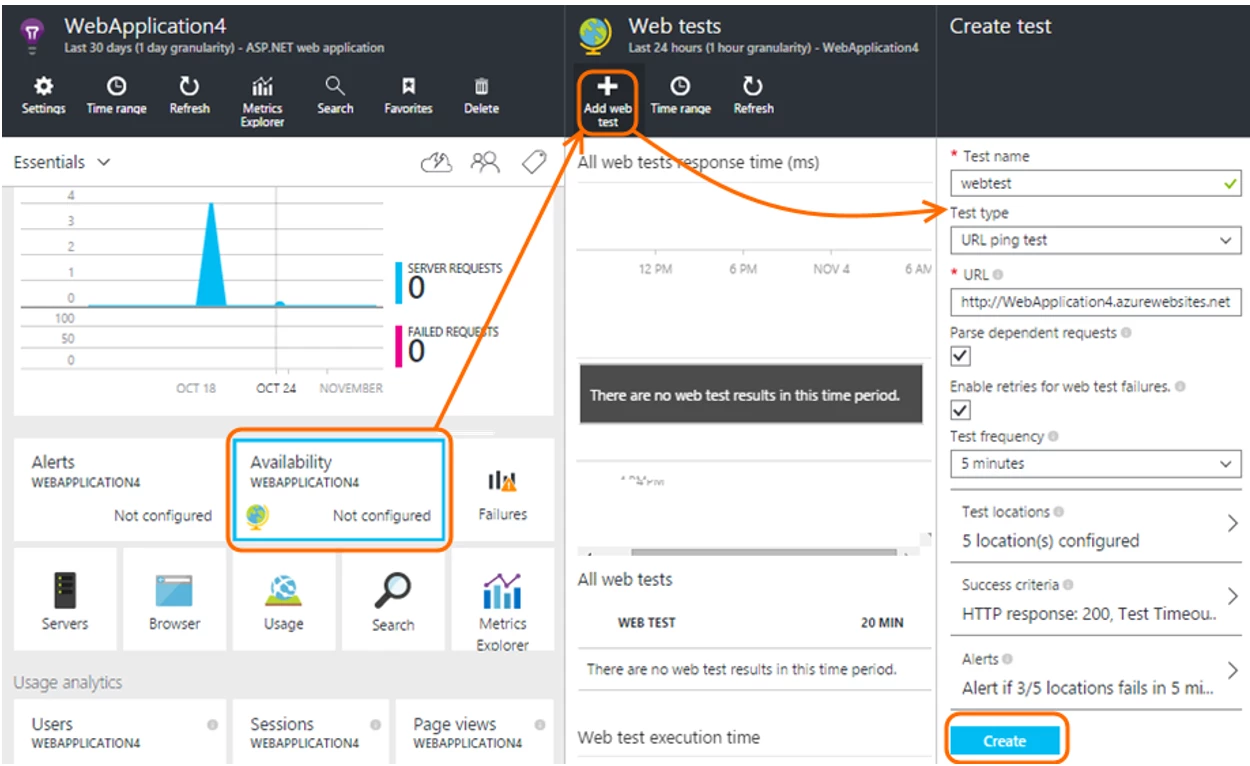
Navigate to your application resource in the Azure Portal, click the Availability tile and then Add web test. Then specify all the details of your test. Read more about web tests.

Exporting the Alert and Web Test Resources
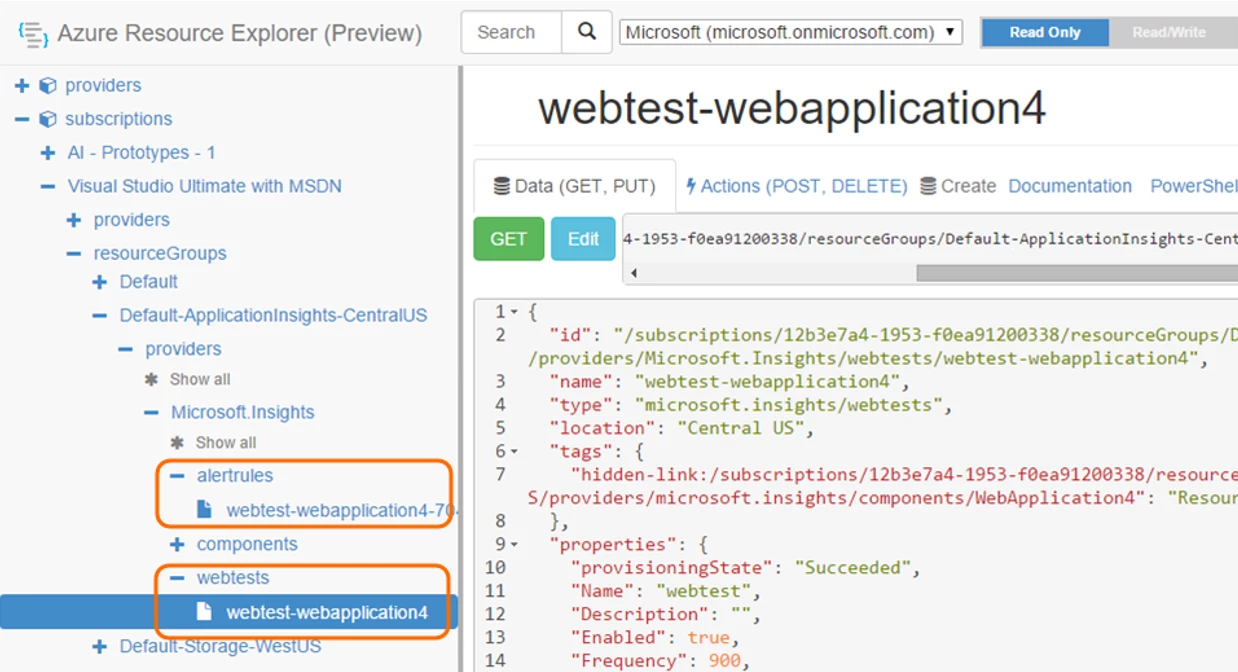
Navigate to Azure Resource Explorer, where you can see all the resources in your subscription, including the resources generated when you created the web test. In Resource Explorer, open your subscription and resource group, then providers, Microsoft Insights. There you’ll see two folders that will be important to us today: webtests and alertrules.

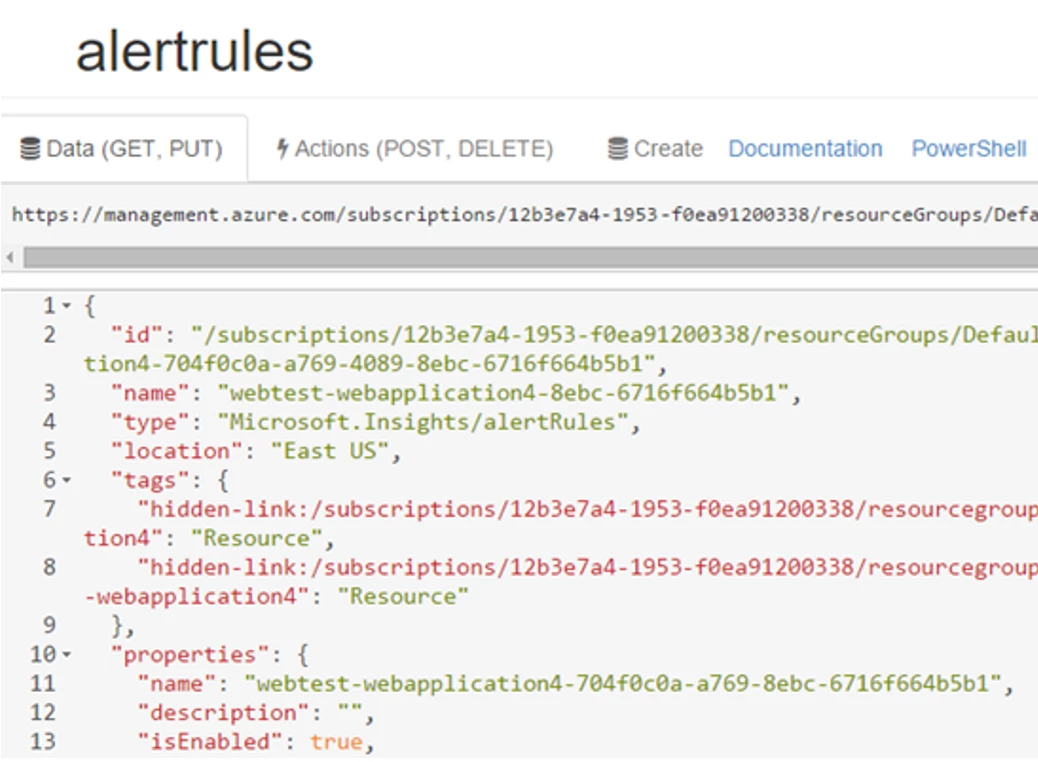
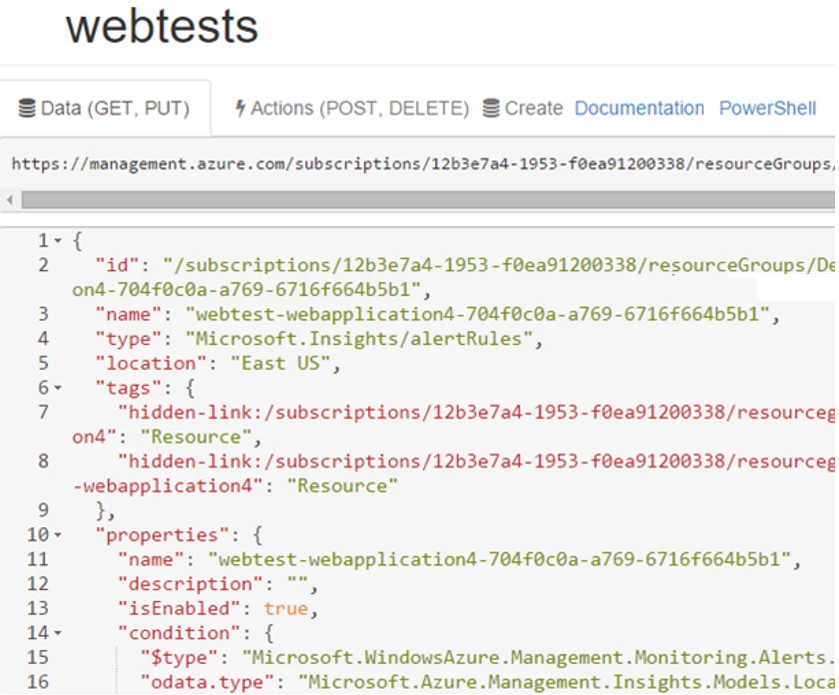
When we created a web test manually, two resources were created: the web test resource and the alert resource. These resources are represented in Azure Resource Explore as JSON files.
Save these files locally to help prepare the template that generates web tests automatically.
Alert Rules Resource

Web Test Resource

Azure Resource Manager
With Azure Resource Manager (ARM) you can deploy a group of Azure resources together. You can make a template of a resource group that contains all the resources you need for the availability test. After creating your resource group, you can manage and deploy the entire group as a logical unit. All Application Insights assets, including web tests, can be managed by ARM.
Make templates from the JSON files
After saving the two resources as separate JSON files you will need to make a few adjustments. Looking at the documentation page for Azure Resource Manger you can see an example template. We will use this example template plus our two JSON files to make our master template.
In your new JSON file put this outline:
{
    "$schema": "https://schema.management.azure.com/schemas/2015-01-01/deploymentTemplate.json#",
    "contentVersion": "1.0.0.0",
    "parameters": {
        "webTestName": { "type": "string" },
        "appName": { "type": "string" },
        "URL": { "type": "string" }
    },
    "variables": {
        "alertRuleName": "[concat(parameters('webTestName'), '-', toLower(parameters('appName')), '-', subscription().subscriptionId)]"
    },
    "resources": [
        {
            //web test JSON file contents
        },
        {
            //alert rule JSON file contents
        }
        //Don't forget to close your brackets
    ]
}
In addition, there will likely be multiple items that need to be changed in the template based on the application. The template has a parameters section so you can pass URL, Application Name, and Web Test name as parameters to the JSON template. Using parameters and variables will let us automate setting multiple names.
I will cover a few items you will need to change using these parameters. Depending on your specific case you will likely need to change other items which may include adding additional parameters and variables.
- Id: You will need to set “id” for both resources. Here we use the resourceId helper function that creates the long path we are replacing using the webTestName parameter we defined at the top of the file.
"id": "[resourceId('Microsoft.Insights/webtests', parameters('webTestName'))]",
"id": "[resourceId('Microsoft.Insights/alertrules', variables('alertRuleName'))]",
- Web Test Name: In your webtest resource there are multiple locations where “name” is set.
"name": "[parameters('webTestName')]","SyntheticMonitorId": "[parameters('webTestName')]"
- Alert Rule Name: In your alertrule resource there are multiple locations where “name” is set.
"name": "[variables('alertRuleName')]",
- Hidden links: We need to replace the hidden links with helper functions. This will allow us to parameterize.
"tags": {
                "[concat('hidden-link:', resourceId('Microsoft.Insights/components', parameters('appName')))]": "Resource"
            },
"tags": { "[concat('hidden-link:', resourceId('Microsoft.Insights/components', parameters('appName')))]": "Resource", "[concat('hidden-link:', resourceId('Microsoft.Insights/webtests', concat(parameters('webTestName'), '-', toLower(parameters('appName')))))]": "Resource" },
- In webtest.json Configuration{}
- Convert the Configuration.WebTest string into a concat function. This will allow us to include variables and parameters instead of hard coded values. For example, to replace URL and Name it would look like the following:
"WebTest": "[concat('')]"
-
- Parse Dependent Request and Expected Http Status Code are set in this string as well. They can be parameterized in a similar fashion.
Learn more about parameters and variables here.
This is not an exhaustive list, the complete list depends on your application.
Lastly, insert the apiVersion after the name tag in every resource.
In my template it looks like this:
"id": "[resourceId('Microsoft.Insights/webtests', parameters('webTestName'))]",
"name": "[parameters('webTestName')]",
"apiVersion": "2014-04-01",
Create a Web Test with Microsoft Azure PowerShell
After saving the resources as JSON files, open Microsoft Azure PowerShell.
- Login to your Azure account.
- To login to your Azure account, use the Login-AzureRmAccount cmdlet. In versions of Azure PowerShell prior to 1.0 Preview, use the Add-AzureAccount command.
PS C:> Login-AzureRmAccount
- Make sure you are in Azure Resource Manager mode.
- Create a new deployment based on your template.
PS C:temp> New-AzureRMResourceGroupDeployment -ResourceGroupName Default-ApplicationInsights-CentralUS -webTestName myWebTest -appName WebApplication4 -URL https://WebApplication4.azurewebsites.net -templatefile .webTestTemplate.json
The parameters are:
- ResourceGroupName: The name of the resource group in which to create your web test. If you are already monitoring your application, you’ll want to use the same group as the Application Insights resource.
- webTestName: The name you want to give the new web test.
- appName: The name of your web application where you want to apply the web test.
- URL: The URL to your web application.
- templatefile: The name of the JSON file we just created.
Note: webTestName, appName, and URL are parameters we created in the JSON file that are automatically parsed and used in PowerShell.
Now you can see your new web test in the Azure Portal.
Use your templates
You can use your templates with PowerShell and with GitHub integration.
Please let us know…
The Application Insights team is committed to providing quality tools for developers. We would greatly appreciate any feedback or new feature recommendations.