As more businesses turn to the Internet of Things (IoT), security and privacy are often top of mind. Our goal at Microsoft is to keep our customers’ IoT solutions secure. As part of our ongoing security efforts, we recently launched the Security Program for Azure IoT, which provides customers with a choice of security auditors who can assess their IoT solutions from device to cloud. Microsoft also offers comprehensive guidance on IoT security and state of the art security built into Azure IoT Suite and Azure IoT Hub. Today, we’re excited to announce another important security feature: IP filtering.
IP filtering enables customers to instruct IoT Hub to only accept connections from certain IP addresses, to reject certain IP addresses or a combination of both. We’ve made it easy for administrators to configure these IP filtering rules for their IoT Hub. These rules apply any time a device or a back-end application is connecting on any supported protocols (currently AMQP, MQTT, AMQP/WS, MQTT/WS, HTTP/1). Any application from an IPv4 address that matches a rejecting IP rule receives an unauthorized 401 status code without specific mention of the IP rule in the message.
The IP filter allows maximum 10 rules each rejecting or accepting an individual IPv4 address or a subnet using the CIDR-notation format. The following two examples demonstrate how to blacklist an IP address and whitelist a certain subnet.
Tutorial: How to Blacklist an IP address
By default, Azure IoT Hub is configured to accept all IP addresses to be compatible with the existing customer configurations prior to providing this feature.
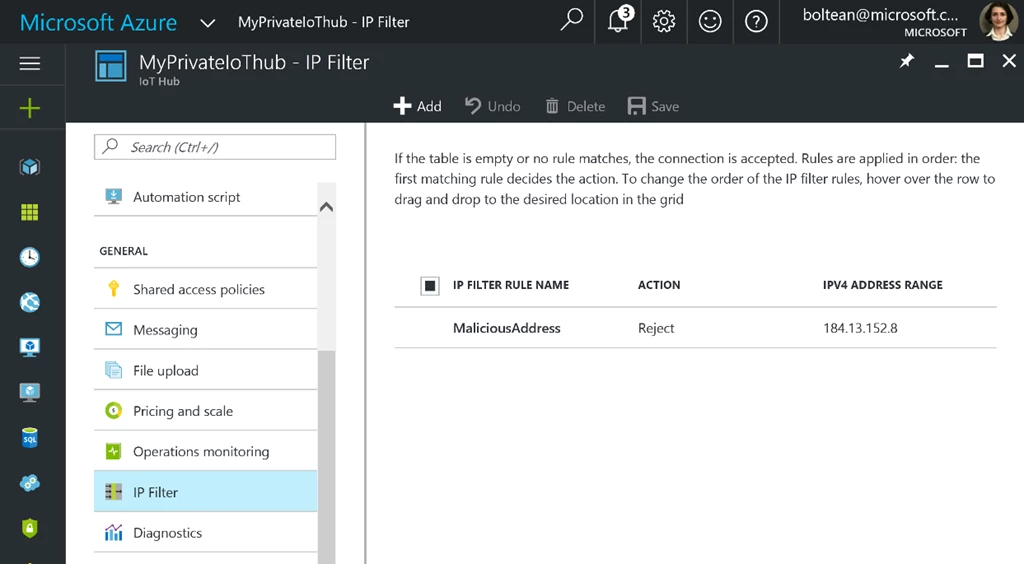
For the purposes of this tutorial, let’s assume the IoT Hub administrator notices suspicious activity from address 184.13.152.8 and wants to reject traffic from that IP address. To block the address 184.13.152.8, the IoT Hub administrator simply needs to add a rule that rejects this IP (as illustrated below):

In this example, any time a device or a back-end application with the rejected IP address connects to this IoT Hub, it will receive 401 Unauthorized error. The IoT Hub administrator will see this being logged, but the malicious attacker will not receive any further error messages.
Tutorial: How to Whitelist a Subnet
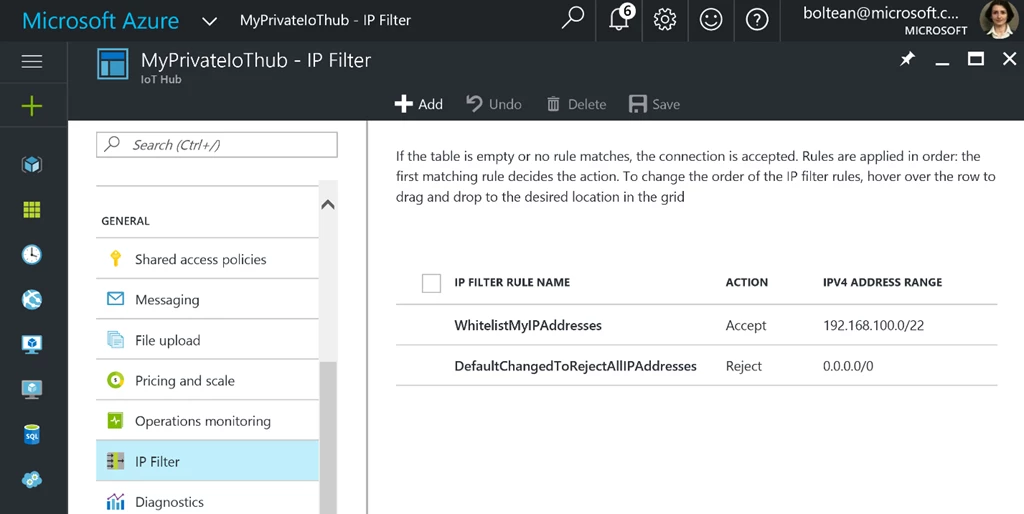
For our next tutorial, let’s assume that the administrator wants to configure the Azure IoT Hub to accept only the IPv4 range from 192.168.100.0 to 192.168.103.255 and reject everything else. This can be simply achieved by adding only two rules using the CIDR notation:
- Accept the CIDR notation mask 192.168.100.0/22
- Reject all IP addresses
The CIDR (Classless Inter Domain Routing) format makes it easy for the IoT Hub network administrator to accept or reject a range of addresses in one rule, so 192.168.100.0/22 will translate into a range from 192.168.100.0 to 192.168.103.255. For those who are not network administrators, there is plenty of documentation online that explains the complexity of the CIDR format or provide calculators. One of our favorites is here. By adding a last rule that rejects 0.0.0.0/0, the administrator changes the default to be blacklist.
The illustration below shows an IoT Hub that whitelists only the 192.168.100.0 to 192.168.103.255 range. Note that the order is important and the first rule that matches the IP decides the action.

Finally, while IoT Hub already supports private connections using Azure Express Route, IP filtering enables an additional level of security by enabling administrators to only accept private Express Route connections. To enable this, you would use IP filtering to accept connections from Express Route and then reject all others.
