We are excited to announce the support for backing up data to Azure from Windows 7, Windows 8 and Windows 8.1 machines, using Azure Backup. You can find more details on the supported client operating system versions, SKUs in KB3015072. By downloading this update, you automatically get all the capabilities released in the last few months, including:
- KB2989574: Support for data sources more than 850GB
- KB2997692: Long Term Retention and Simplified Signup & Registration
- KB2999951: Support for Windows Server 2008
- KB3015072: Support for Windows 7, Windows 8, Windows 8.1
This release opens up new scenarios for Azure Backup by enabling customers to back up their on-premises files and folders directly to Azure. Once the initial backup copy is completed, Azure Backup tracks the changes to the backed up files and efficiently transfers only the changed content over HTTPS.
Setting up Azure Backup is really simple, and we have a 3 part video series which explains the steps. The steps are detailed in a getting started blog article as well.
We will cover a few best practices and recommendations for this scenario in this blog article:
- There are two different ways of registering machines to the backup vaults that store data:
- Option #1: Register one machine per backup vault. The backup vault is created under Recovery Services in your Azure subscription. Please be aware that only 25 backup vaults can be created per subscription using this option. If you have more machines to backup to Azure, please use the second option.
- Option #2: Register multiple machines to the same vault. This enables up to 50 machines to be registered with a single backup vault.
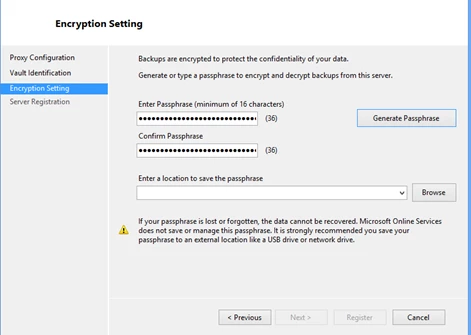
In both the options, access to the backup data is controlled using an encryption passphrase. At the time of registering a machine to a backup vault, an encryption passphrase is provided by the user – and this is used to encrypt and decrypt the data being backed up. With different encryption passphrases being used for different machines, isolation is guaranteed.
2. Scheduled backups to Azure are intelligently skipped if your laptop is running on battery. Instead, the backup jobs are started as soon as the laptop is plugged back for charging.
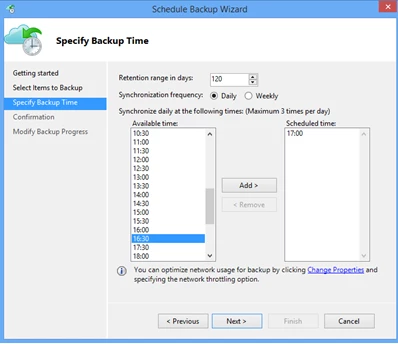
3. When picking a backup time on a day, please pick a time that works best for your setup. If you tend to shut down your machine at night, ensure that the backup is not scheduled for such a time.
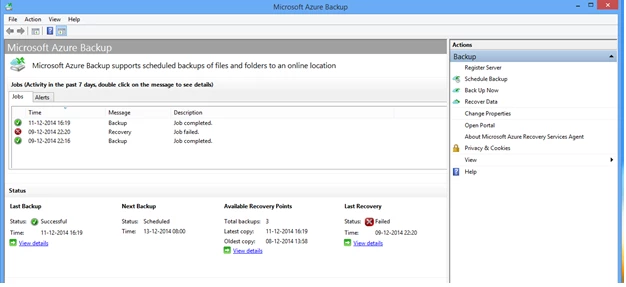
4. If you wish to monitor the backup progress or state of the backup jobs, search for “Microsoft Azure Backup” and launch the corresponding mmc. It provides the latest information and stats on the backup jobs.
In summary, with this release you now have the added capability to backup data to Azure from your client machine. If you are new to Azure and need an account/subscription, click here to get started. You can also download the Azure Backup agent directly from here.
If you need help, post your question in the Azure Backup forum. If you have suggestions which you would like to add/vote for existing ideas, visit our feedback page or leave a comment on this blog.


