[This article was contributed by the SQL Azure team.]
In this blog post we will show you how to export data from your SQL Azure database to a local SQL Server database using the SQL Server Import and Export Wizard in SQL Server Management Studio 2008 R2. This is a great technique to backup your data on SQL Azure to your local SQL Server.
We have installed the Adventure Works database for SQL Azure to test with on our SQL Azure account; you can find that database here.
The first thing we need to do is connect SQL Server Management Studio 2008 R2 to SQL Azure; in this demonstration we are running the SQL Server Import and Export from the SQL Server Management Studio. How to connect to SQL Azure was covered in this blog post.
Here is how to import from SQL Azure:
1. In SQL Server Management Studio, connect to your local SQL Server (this could be SQL Server Express Edition 2008 R2).
2. Create a new database named: AdventureWorksDWAZ2008R2.
3. Right click on that database and choose from the drop down context menu All Tasks | Import Data…
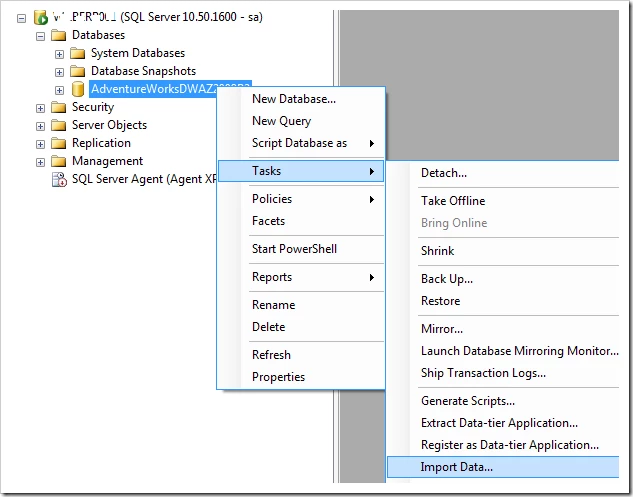
4. This will open the SQL Server Import and Export Wizard dialog.
5. Click next to get past the starting page.
6. On the next page of the wizard you choose a data source. In this example, this is SQL Azure. The data source you need to connect to SQL Azure is the .NET Framework Data Provider for SqlServer.
7. Scroll to the bottom of the properties, here is where you need to enter your SQL Azure information.
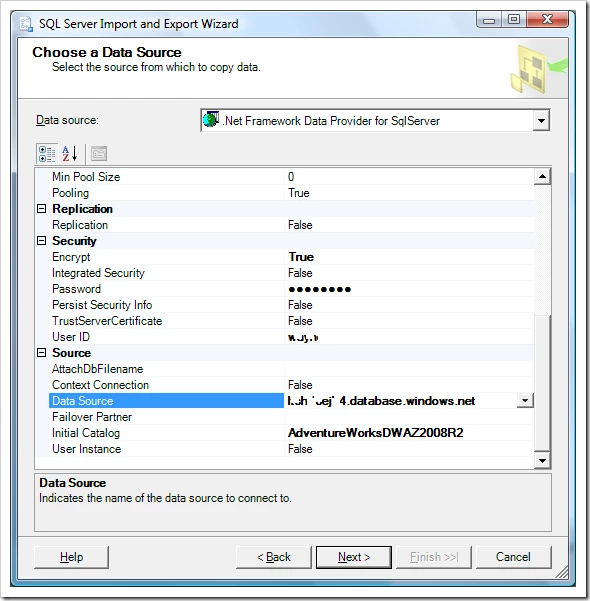
8. Under Security set Encrypt to True.
9. For the Password enter your SQL Azure password.
10. For User ID enter your SQL Azure Administrative username.
11. Under Source for Data Source enter the full domain name (Server Name) for your account on SQL Azure. You can get this from the SQL Azure Portal.
12. For Initial Catalog enter the database name on SQL Azure.
13. Once you have all the data source information filled out, you can click on Next > and the Choose a Destination wizard step will appear.
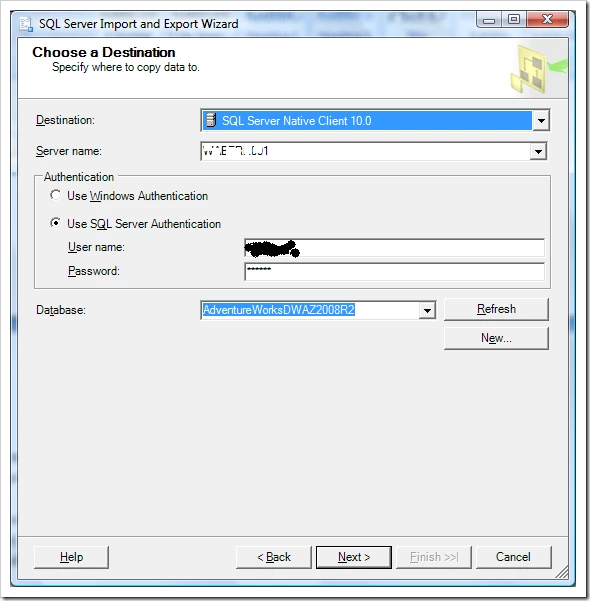
14. The destination server is your local server in this example. Because we chose Import Data… our local database is already filled in for us. Enter your security credentials and click Next >. The Specify Table Copy or Query dialog will appear.
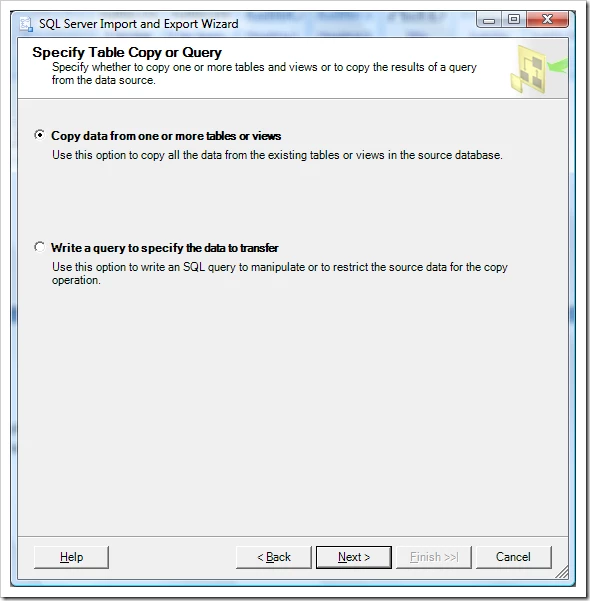
15. Chose Copy data from one or more tables or views radio button. Then press Next >.
16. The Select Source Tables and Views dialog will appear and the SQL Server Import and Export Wizard will query the SQL Azure database and return a list of tables and views on SQL Azure. Check the ones that you want to import into your local database.
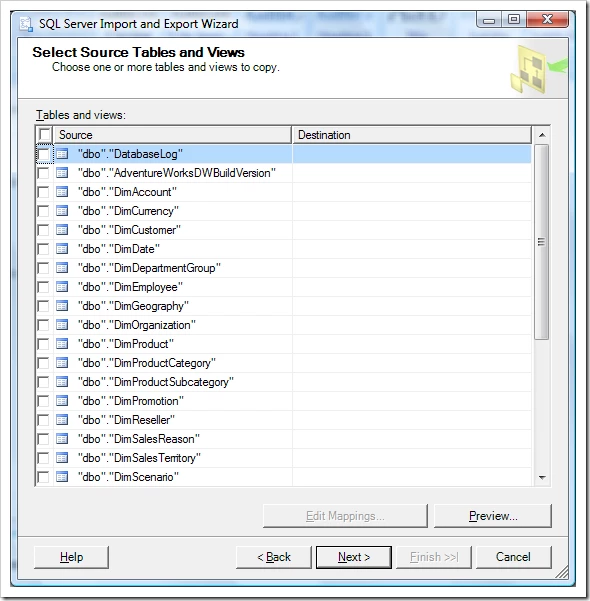
17. Once you have selected the tables and view press Next > and the Save and Run Package wizard step will appear.
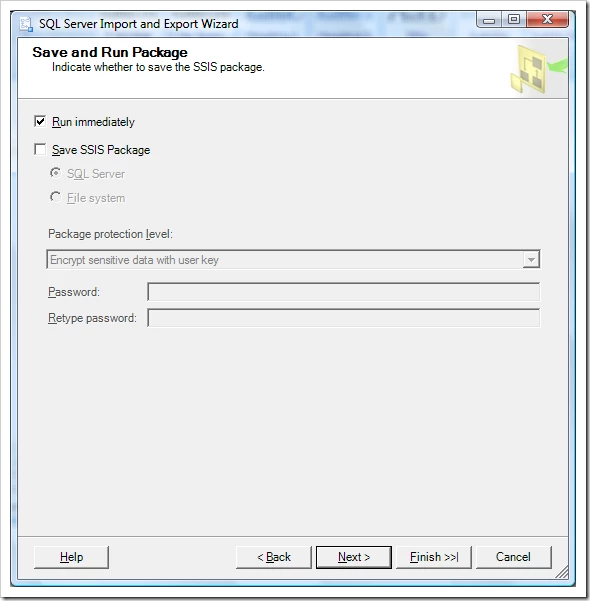
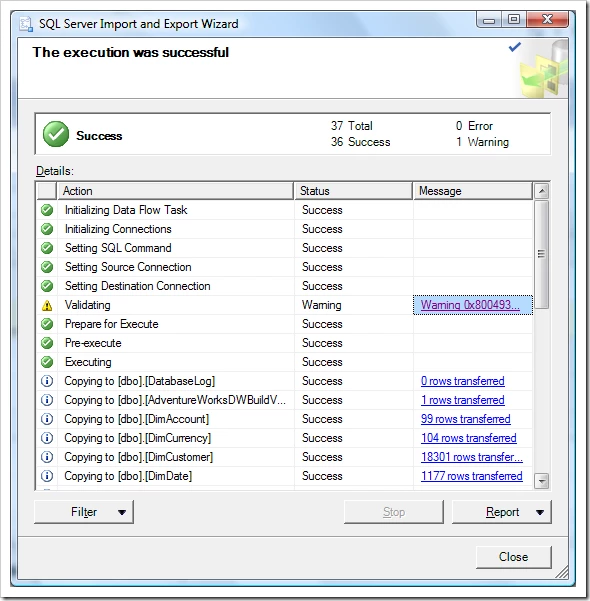
18. Click the Finish >>|button and then Finish again and the SQL Server Import and Export Wizard will import your data from SQL Azure to your local SQL Server.
Summary
SQL Import and Export Wizard is an easy way to backup your data locally from SQL Azure, or you can use it in reverse to export data to SQL Azure. The trickiest part is translating the nomenclature of the .NET Framework Data Provider for SqlServer to the terminology in SQL Azure. Do you have questions, concerns, comments? Post them below and we will try to a
