Automation, How to, Management and Governance
Getting Started With Azure Automation – Runbook Management
Posted on
8 min read
Azure Automation is a new service in Azure that allows you to automate your Azure management tasks and to orchestrate actions across external systems from right within Azure. It is built on PowerShell Workflow, so you can take advantage of the language’s many features. If you have not yet signed up for Azure Automation, sign up for our free preview here. You can also learn more about Azure Automation here.
In this post, you will learn some of the fundamentals for runbook management inside of Azure Automation. I’ll walk through the steps to enable you to quickly create an Automation account, create or import a runbook, test and publish the runbook, manage logging for that runbook, and setup a schedule for starting the runbook.
The first thing to do when you start using Azure Automation is create an Automation account. Automation accounts are like Azure Storage accounts in that they serve as a container. In Automation they are a container for all your runbook, runbook executions (jobs), and the assets that your runbooks depend on. Once Automation goes to GA, you will be able to select which region you would like to use for your Automation account. This will enable you to create affinity with the regions that your other services are located in to maximize efficiency. While Automation remains a Preview service, there will only be one region available, East US.
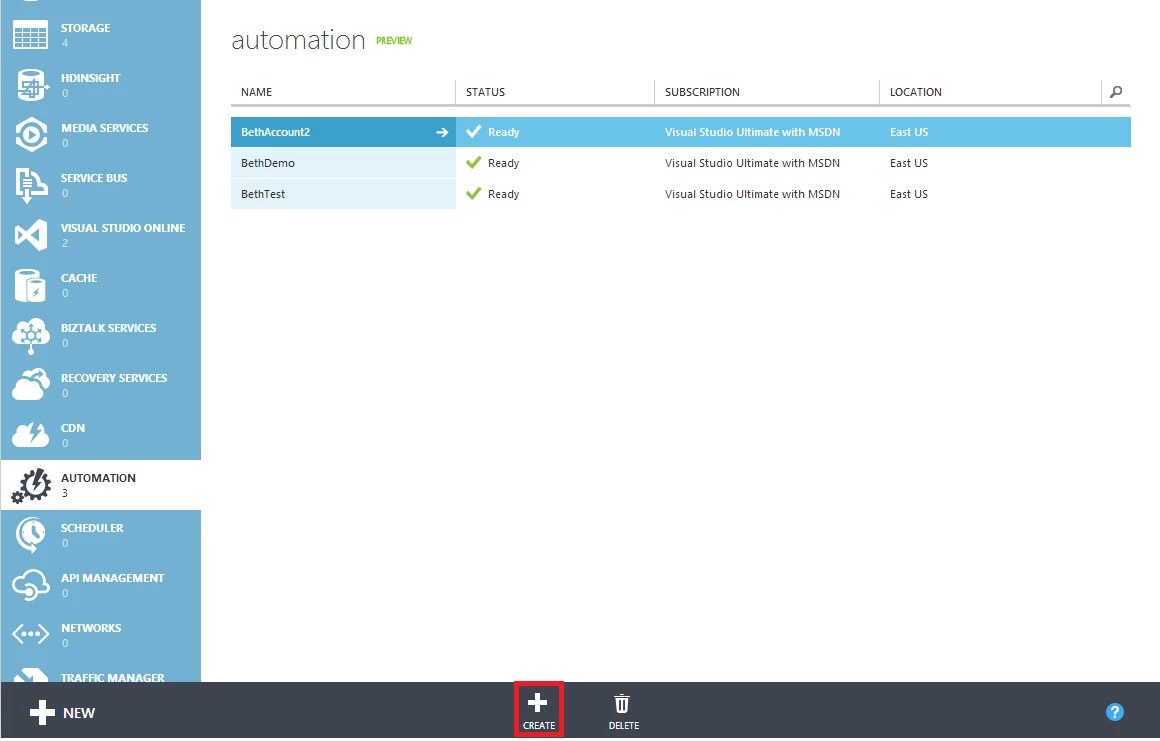
To create an account, select Automation > Create.
You will then be prompted to add a name for the account, select a subscription (if you have multiple subscriptions available) and select a region.
Creating Runbooks in Automation
Now that you have an Automation account, you are ready to start creating runbooks to automate your cloud management. There are two different ways that you can create runbooks in Automation:
- Quick Create a new runbook
- Import an existing runbook (PowerShell Workflow in a .ps1 file)
Creating a new Runbook with Quick Create
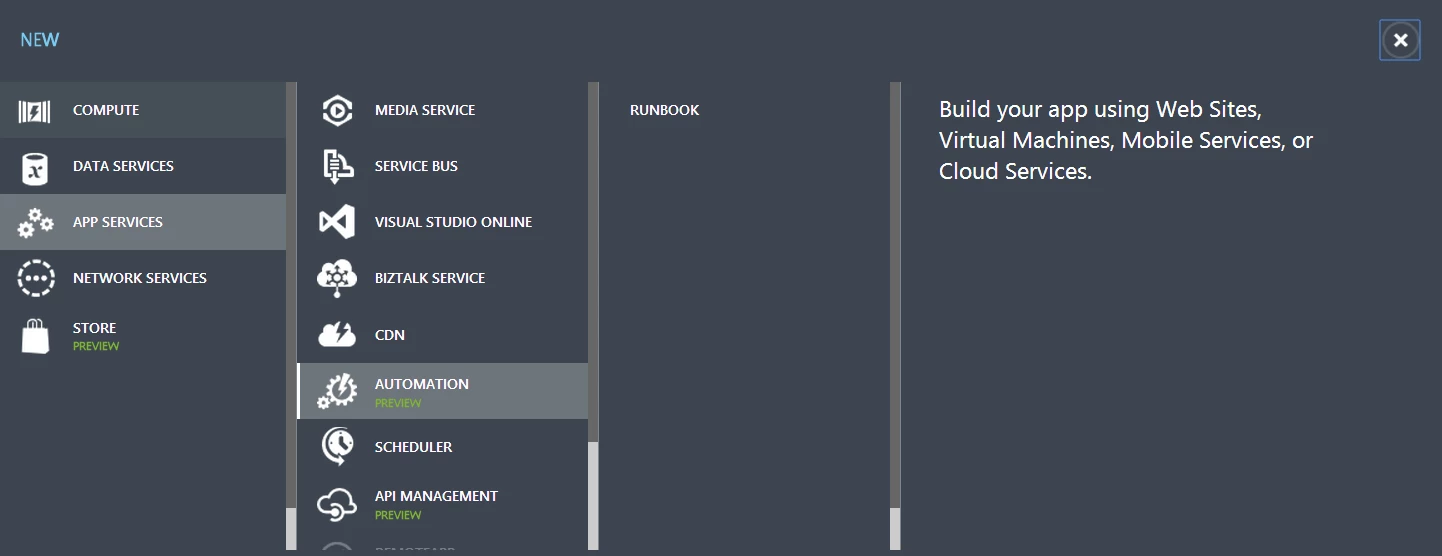
To create an empty runbook, use Quick Create. Quick Create can be accessed through +NEW -> App Services -> Runbook -> Quick Create.
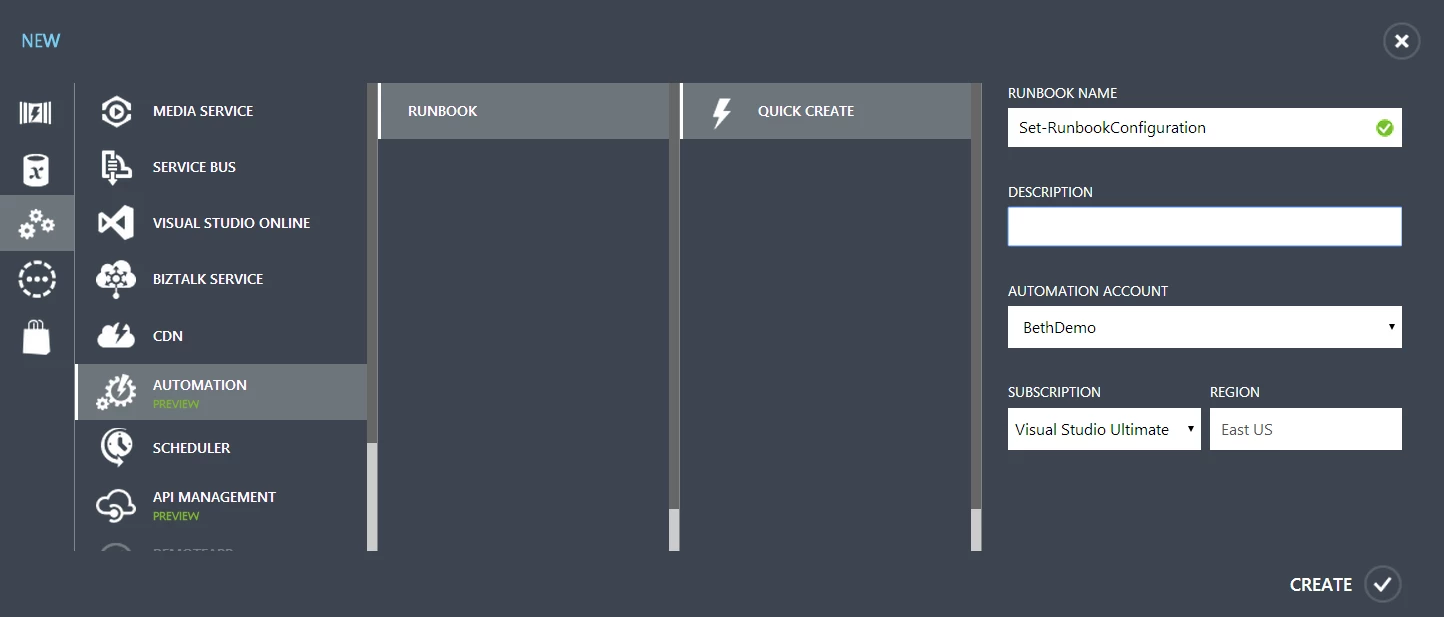
Here you can provide a Name for the Runbook, a Description, and select the Automation Account that you would like to create the runbook in. Keep in mind that the name of the runbook cannot be changed, but you will be able to change the description later from the runbook Configuration tab. It’s generally a good practice to follow the PowerShell verb-noun naming convention and to use only approved PowerShell verbs. In this example, I’ll use “Set-RunbookConfiguration”.
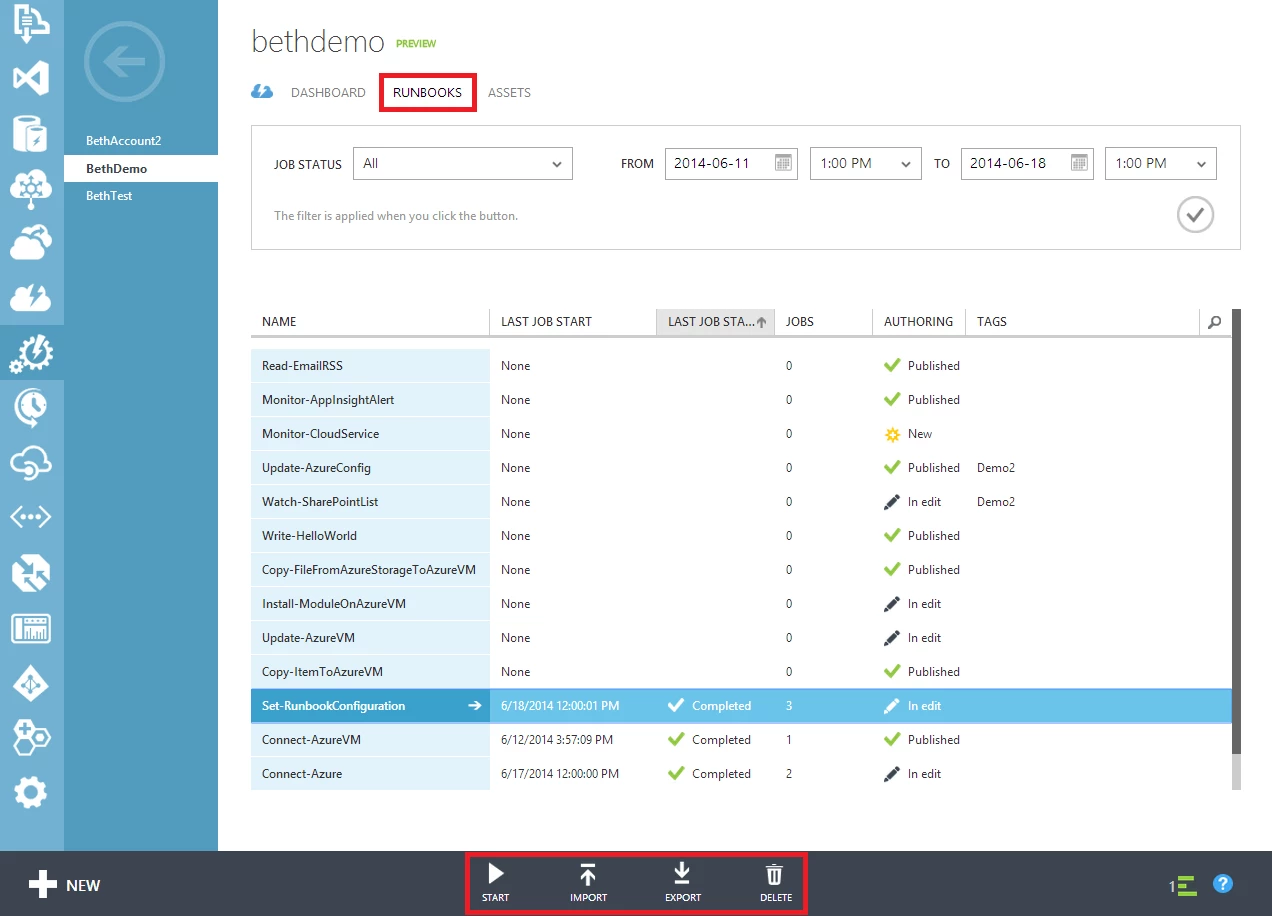
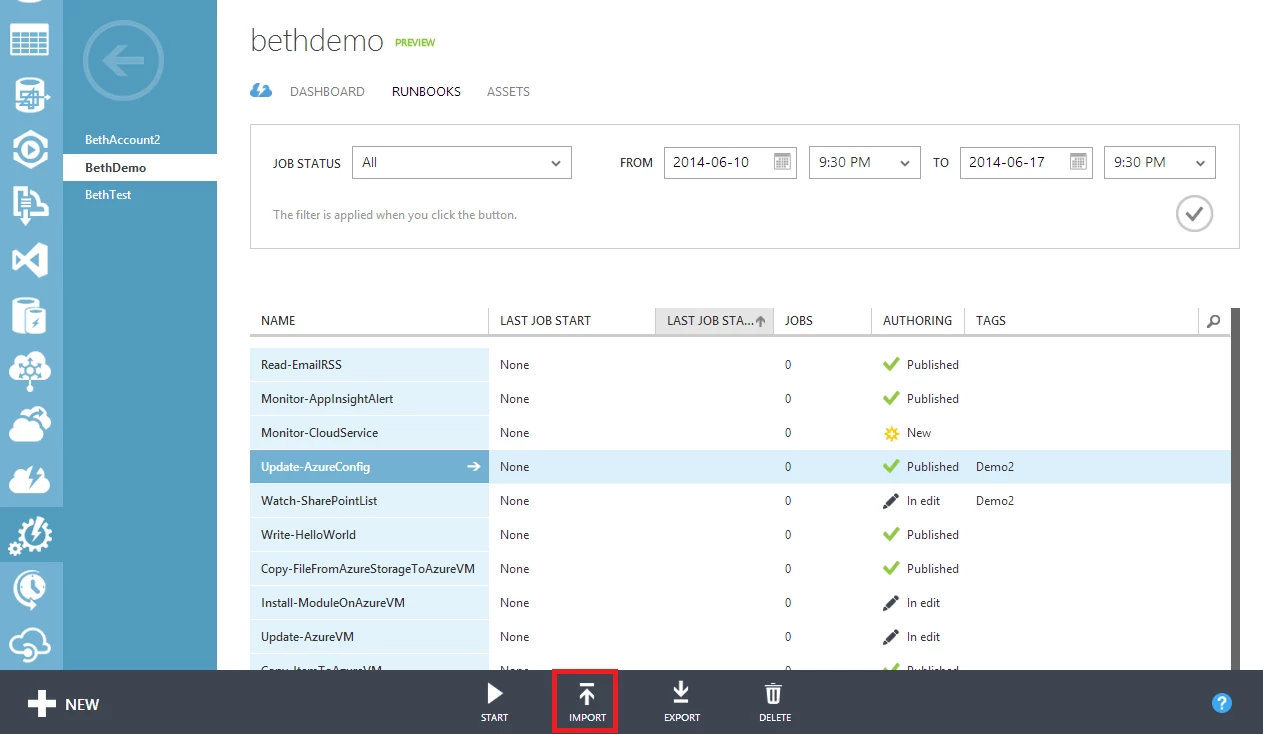
When ready, click Create and the new runbook will be created and displayed in the Runbooks list. Consider this “Runbooks” view your own private library of runbooks you can use to automate various processes. You can perform basic operations on your runbooks from this view including starting, importing, exporting or deleting. I will cover some of these later in the post.
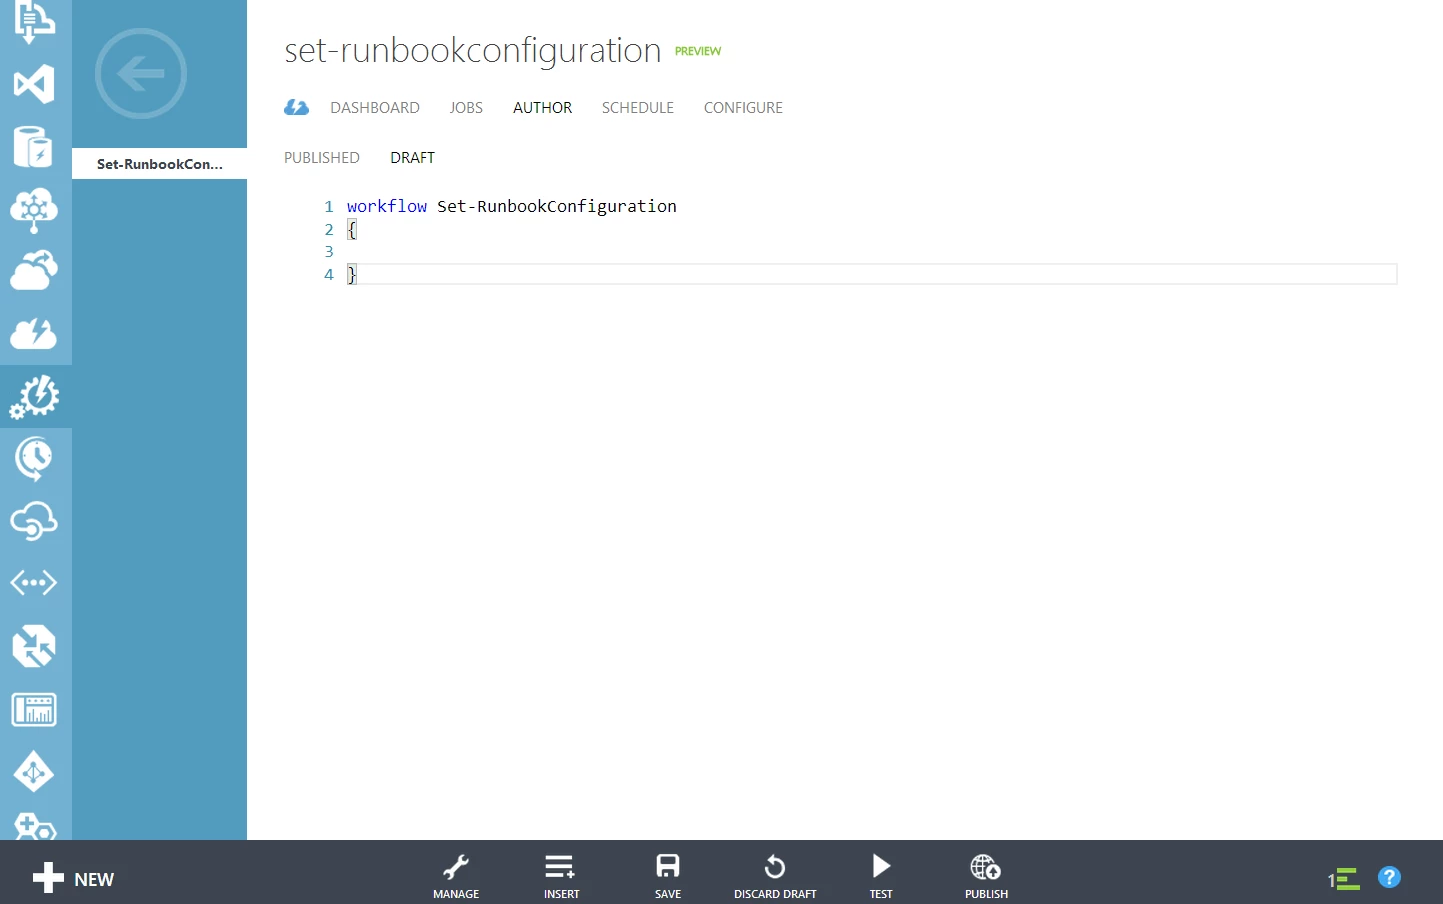
The Runbook is now created in the Runbooks view and is listed as New. At this point you are now able to select the Runbook, then select Author to begin authoring the Runbook.
You are now able to start authoring your runbook using standard PowerShell Workflow syntax. Note that PowerShell Workflows are different from standard PowerShell scripts. You can read more about PowerShell Workflows here. If you run into any questions around creating runbooks, check out our forum to see if anyone else has had the same problem, or to post a new question.
Importing a Runbook
If you already have a (.PS1) PowerShell Workflow, or runbook that you wrote or discovered earlier, importing it into your Runbooks Library is easy. To follow along with this, you can download a runbook from the Script Center and import it to your system. Later on, if you don’t need this runbook, you can delete this runbook to keep your runbooks list clean.
The “Import” function is located in the command bar of the runbooks tab:
Sorting and Filtering Runbooks and Jobs
Now that you have a runbook or two in your system, let’s take a look at what you can do in the Runbooks view (shown above). This view shows us specific details about the jobs that have been started. Users have the ability to sort by Name, Last Job Start, Last Job Status, Jobs, Authoring or Tags – let’s talk about some of these in more detail.
- Name – Allows sorting by runbook name, for example A-Z or Z-A.
- Last Job Start – Allows sorting by the last job that was started by the runbook in the following format (MM/DD/YYYY HH:MM:SS AM|PM). Note the last job start could also be “None” indicating the runbook has never started a job.
- Last Job Status – Allows users to view the status of the last job. For example, my job can be in one of several finite states including Suspended, Completed, Failed, Queued, Running or Starting.
- Jobs – Displays the number of jobs associated from the runbook. This number only includes jobs that ran in production and will not include test runs.
- Authoring – Shows the current status of the runbook definition.
- New – A non-production version (Draft in the UI) exists that is actively being edited. You can only execute this runbook in “Test” mode.
- Published – A production version (Production in the UI) exists that can start jobs, and no draft version exists. You can only execute this runbook in “Production” mode.
- In Edit – A production version exists as well as a draft version that is currently being edited. Schedules, and any time you start a runbook (from another runbook, from the UI, or from a cmdlet), the production version of the runbook will be started. The draft version can only be started in “Test” mode, in the authoring pane.
- Tags – Tags allow you to categorize your runbook so that you can quickly identify the runbook that you want to find. For example, you may want to categorize your runbooks by production or test and by workload, or technology. Your tag may look like: PROD: Windows Azure, IaaS or TEST: Virtual Machines, Library. These tags are free-formed allowing the user to provide whatever makes sense.
- Filter – Selecting the magnifying glass icon on the top-right, also allows users to filter on either the Name or Tags column in the Runbooks view.
- Range – Lastly, users are also able to use the top level filtering mechanism for viewing Job Status from X point in time to Y point in time relevant to the Job Status (above).
Authoring a New Runbook
Now, let’s create a simple runbook to go through the runbook authoring experience. I’ll walk you through adding some different stream output types that could help you troubleshoot runbook jobs if there is ever a problem, and then show you how you can turn logging on or off for your runbook in production.
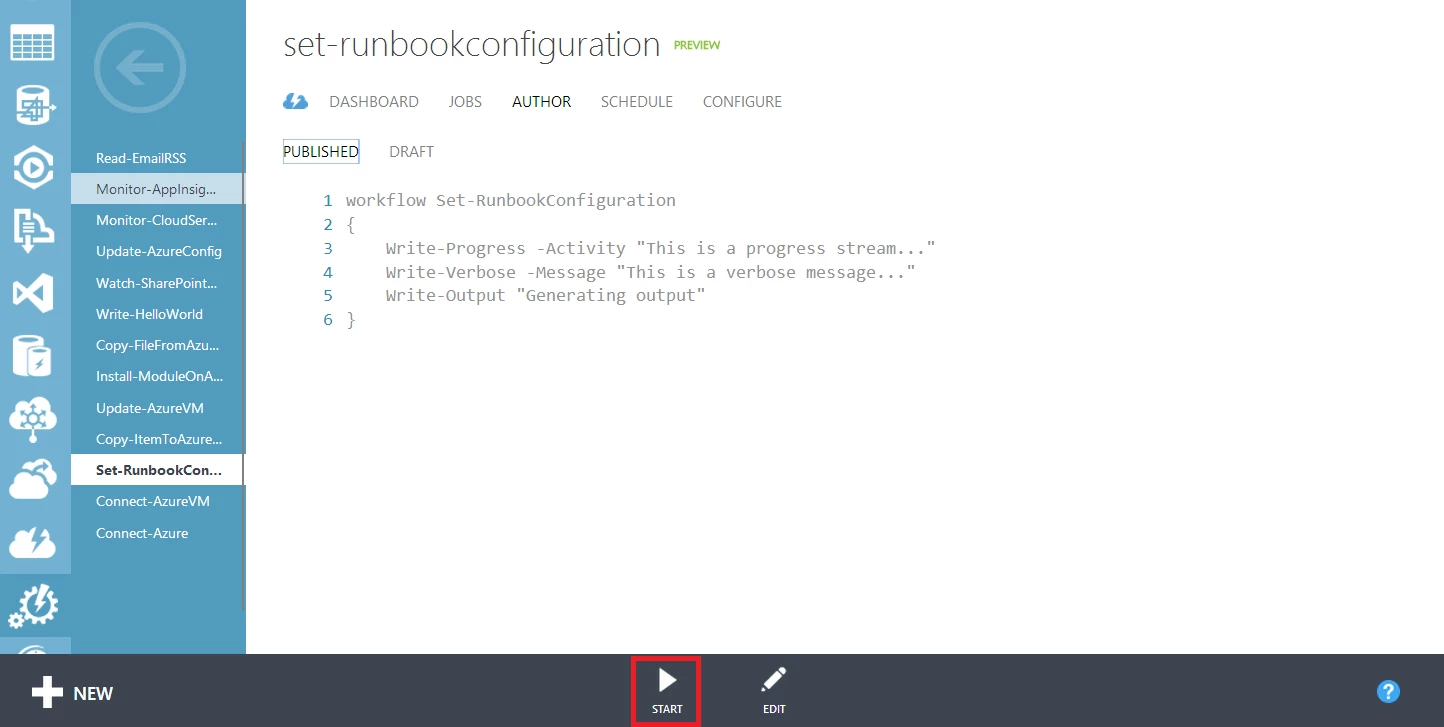
Select the “Set-RunbookConfiguration” runbook that we created earlier from the Runbooks view to begin authoring your runbook. Now click on the Authoring tab to view the runbook code. From here you can see Azure Automation has automatically added “workflow name { }”. Insert the Runbook definition as seen below:
Verbose and progress streams are examples of streams that you can enable or disable. Verbose is especially useful when you are troubleshooting a production runbook as it will provide additional information. Write-Output will always be displayed, so you will always see the results of your runbook.
In addition to typing your runbook manually, you can also use the “Insert” button to insert an Activity from any module loaded into Azure Automation, another published runbook, or an asset like a variable or connection. You can manage assets from the Assets tab or use the Manage button to create one without leaving the runbook authoring experience. Assets are available globally for your Automation service. We will have a more detailed post around assets in the future.
Once you are satisfied with your runbook, you are able to Save, Test or Publish the Runbook. Be aware that the “Test” feature actually runs the workflow and is not a –WhatIf.
In this case, go ahead and publish the runbook. This should bring you to the read-only Published view. You can now start the runbook by clicking the Start button in the commands bar. This will create an instance of a runbook, known as a job. Note that if you start the runbook without taking the steps in the following “Configuring a Runbook” section, you will not see the verbose or progress streams because they are not enabled. Go ahead and click Start so you can compare results.
Configuring a Runbook
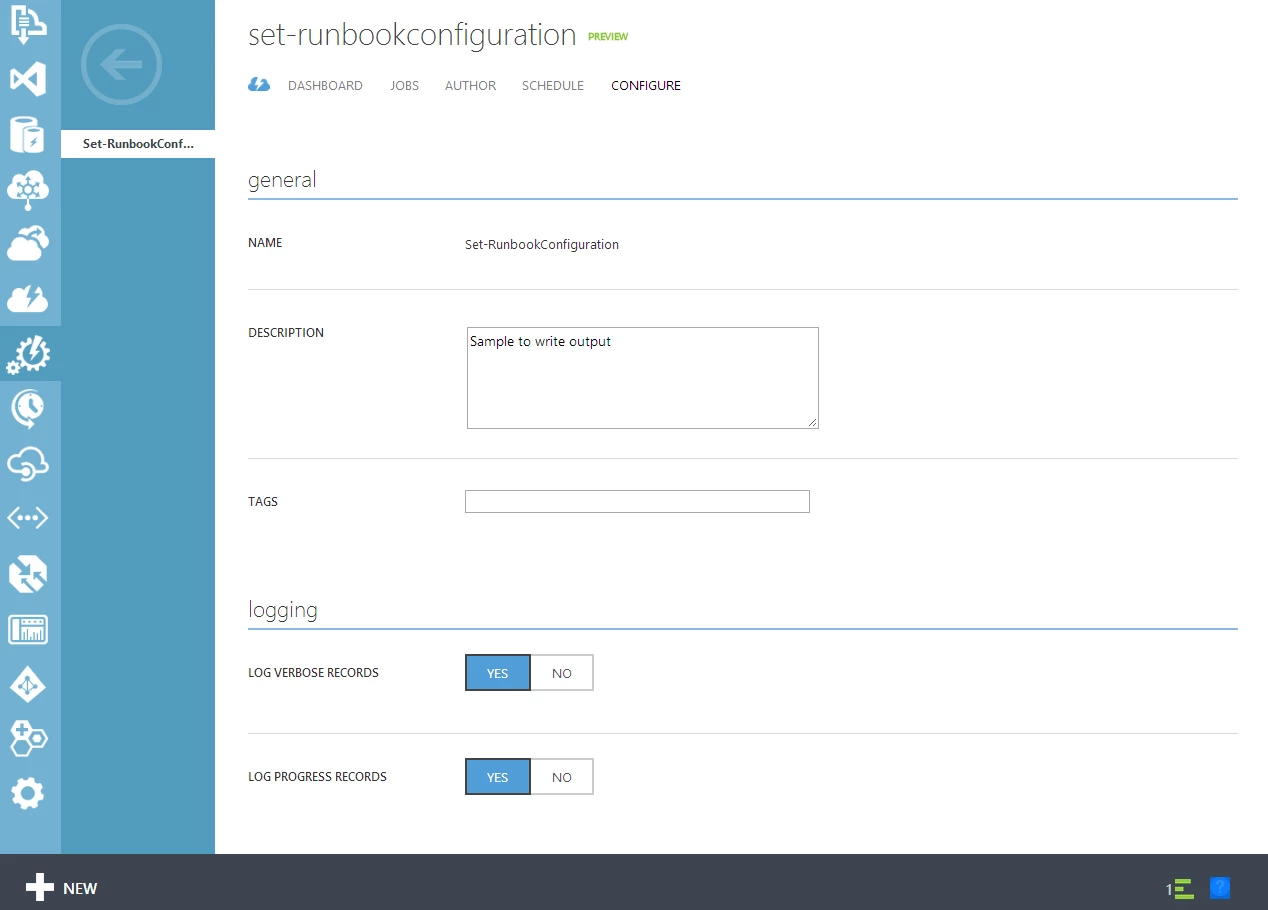
You can easily configure your runbook using the Configure tab of the Runbook.
From the Configure tab you are able to modify settings specific to the Runbook you created. For example you can change the Description or add Tags to help you organize your runbooks. This can be especially helpful if you have a series of small runbooks that work together to complete your entire workflow. You can also manage your PowerShell stream logging here.
Since we have verbose and progress streams that we would like logged for later viewing, we will modify the Log Verbose Records and Log Progress Records. Set these options to “Yes” to turn on all logging levels for your runbook.
Now that you have modified the configuration settings, start the runbook again. You can also start runbooks programmatically using the Start-AzureAutomationRunbook cmdlet. You can read more about our PowerShell cmdlets here. In order to manage Azure services, you need to import an Azure management certificate in Automation Assets so that you can make PowerShell calls into these services. You can learn how to import the management certificate on a previous blog “Managing Azure Services with the Microsoft Azure Automation Preview Service”.
Investigating a Runbook Job
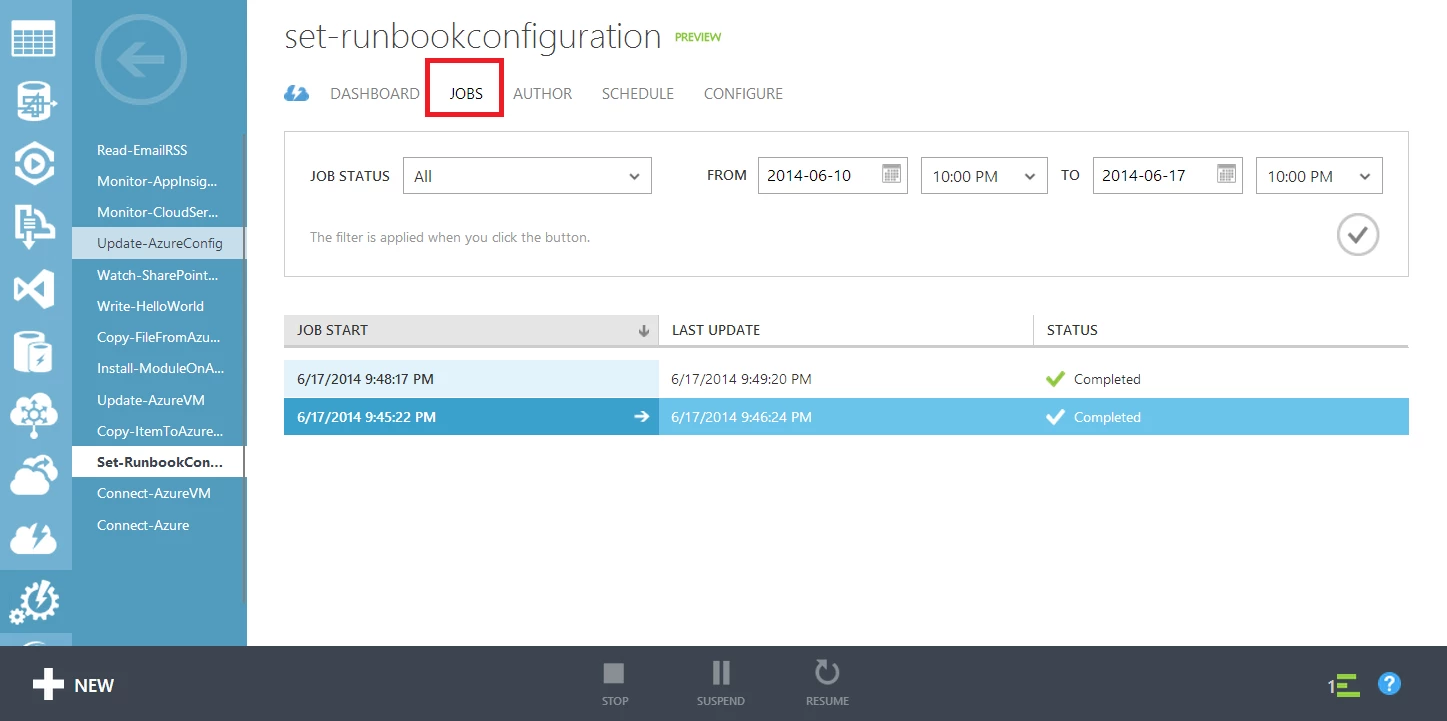
If you have been following along, you should see that the two jobs you just ran have finished successfully. To learn more about what went on in this runbook’s jobs, click the “Jobs” view to see all jobs that have run (within the selected time window).
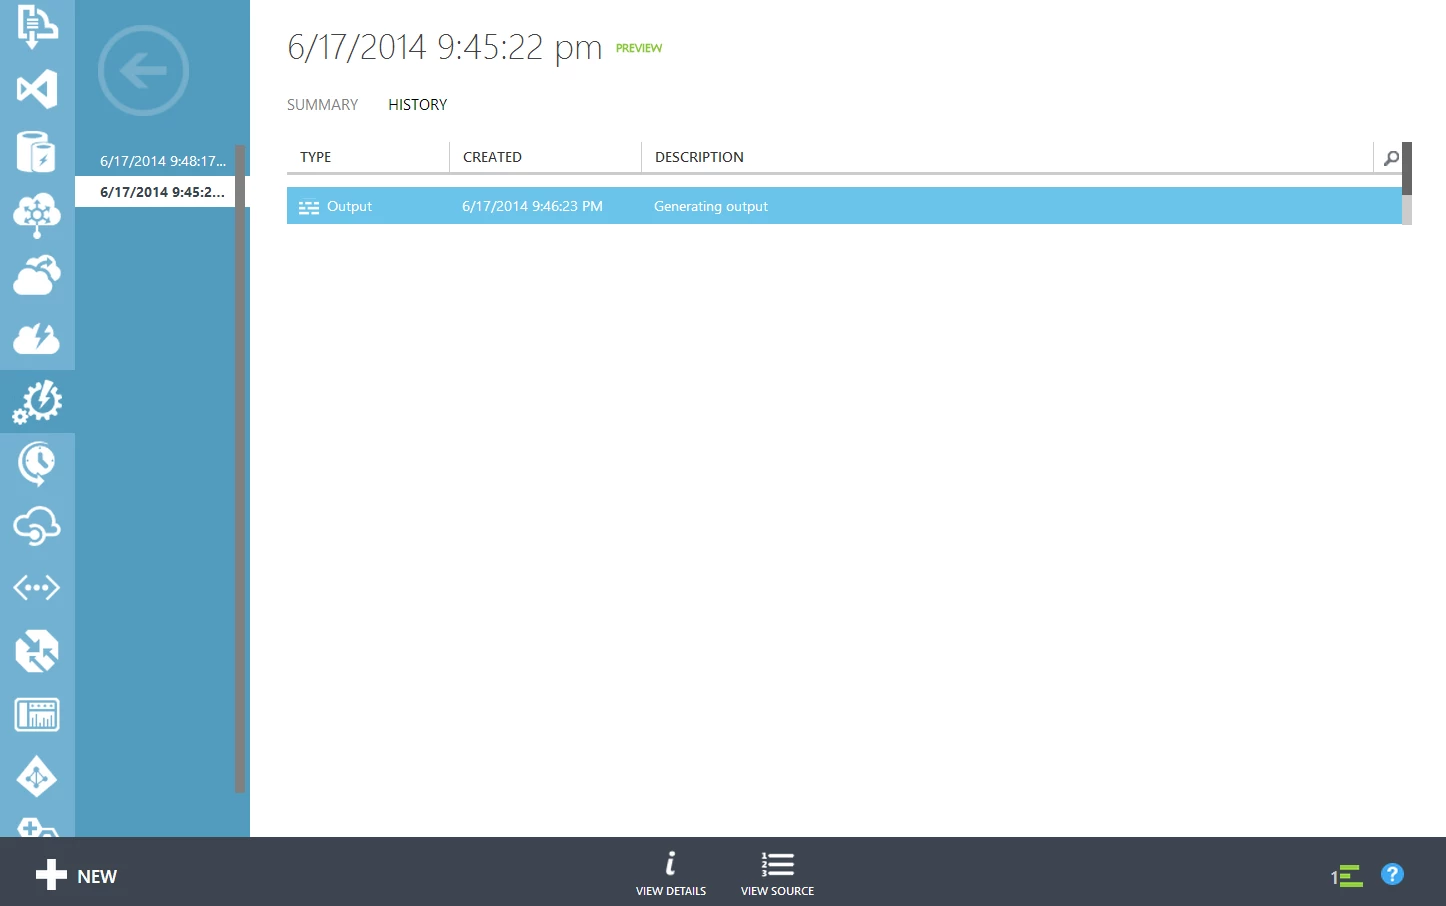
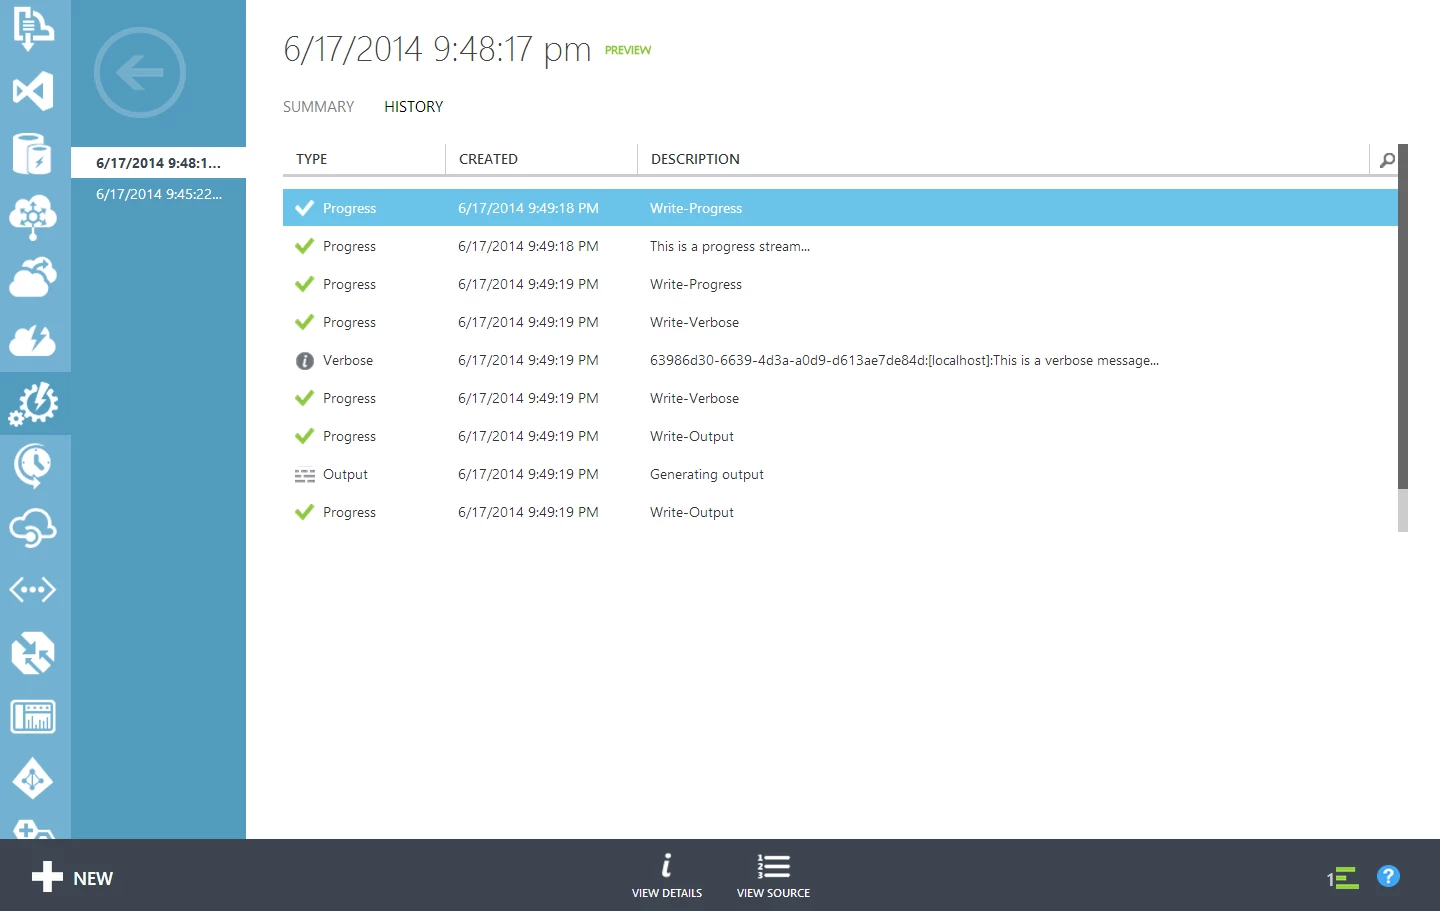
If you click on a job, you will be taken to the job dashboard view where you can review the job summary, input parameters and output. If you click on a job and select the History tab, you can view specifics about the logging you enabled earlier. For example, because we enabled all log streams, we can see Progress and Verbose output in our second job, but can only see the Write-Output output in our first job. The runbook source (the version that was executed for the job) is also available by clicking on the View Source command so that you can see the actual runbook that was used for this job.
Job 1:
Job 2:
Scheduling a Runbook
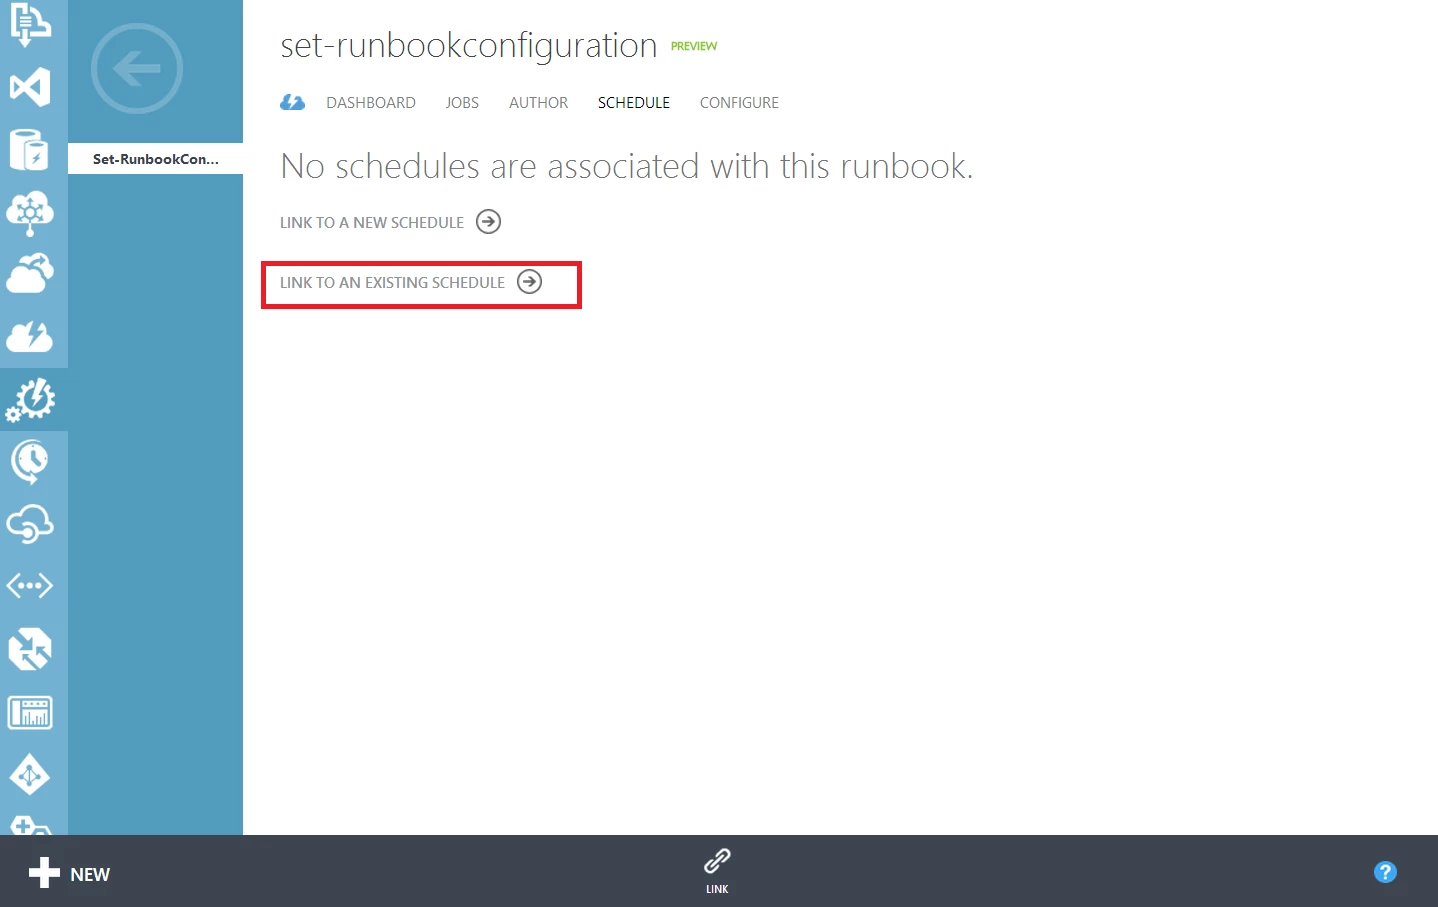
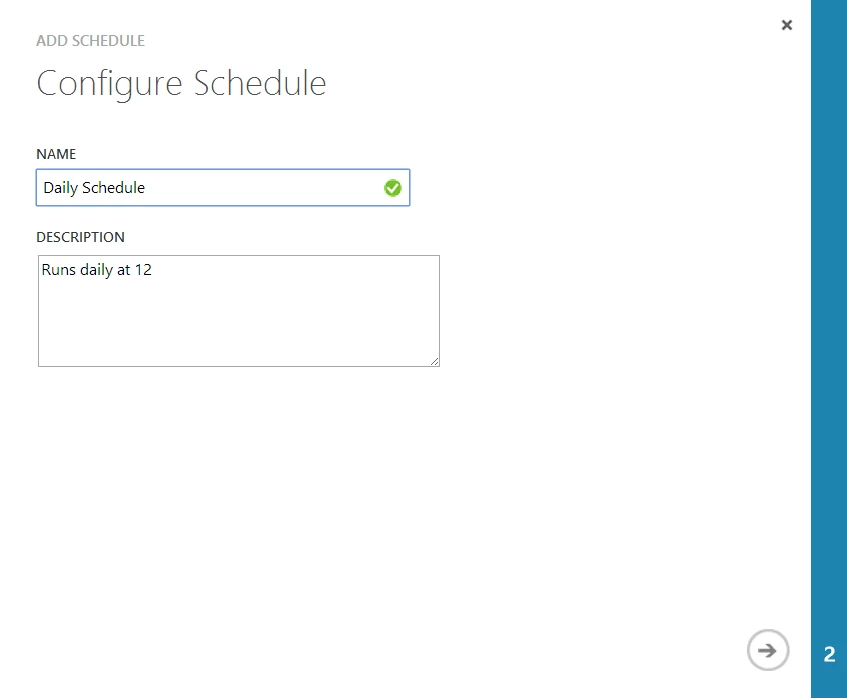
In Azure Automation you are also able to compose a schedule. From the runbook that we have been working on, go to the Schedule view and select “Link to a new schedule”.
Provide a name and description for the schedule.
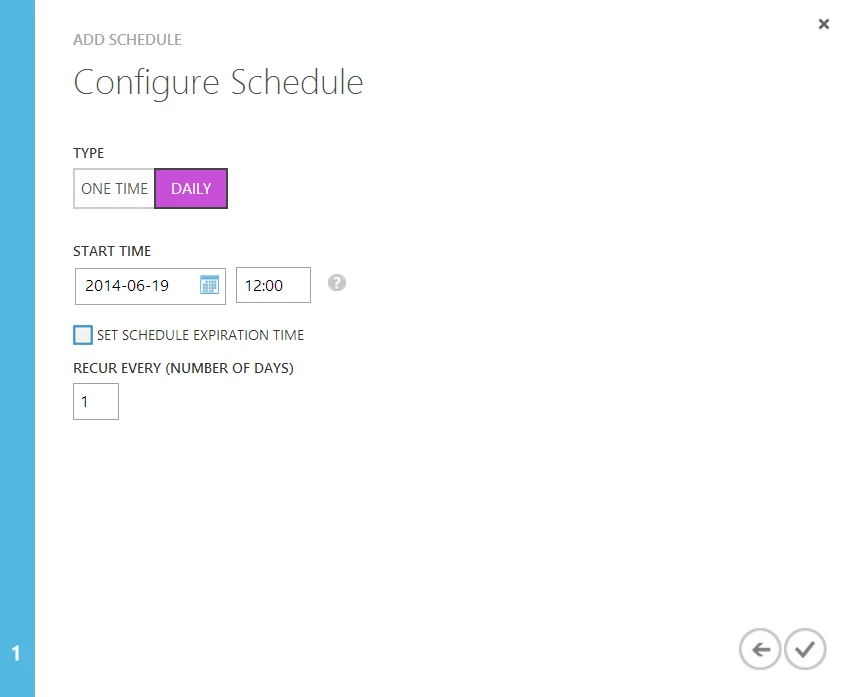
Finally, select your schedule preferences: Type, Start Time, Expiration date, and Recurrence.
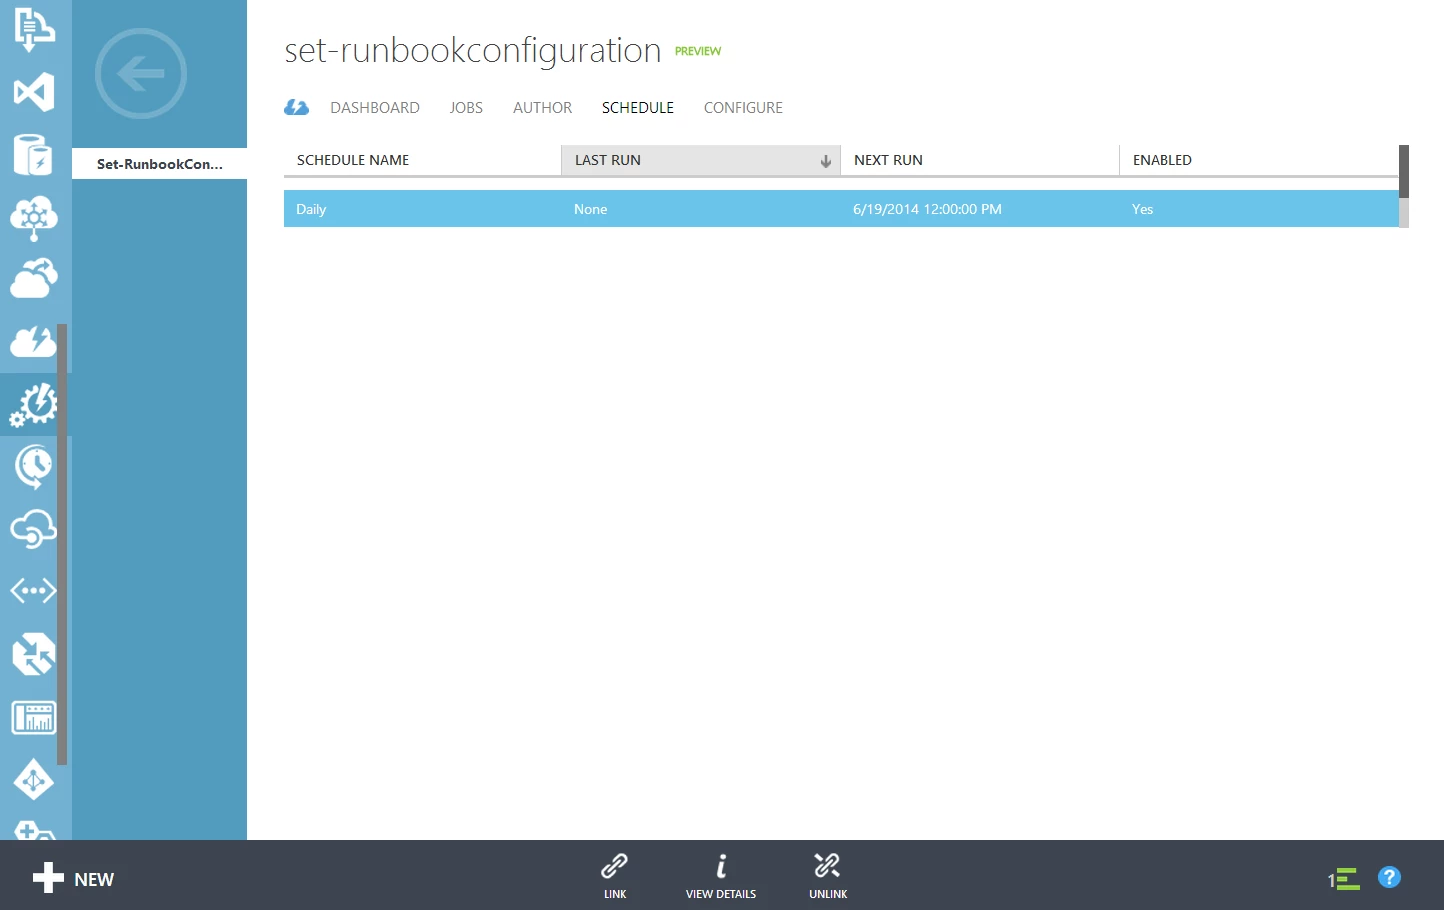
This schedule will now be active and will run in your local time zone unless otherwise modified. You can also reuse this schedule for other runbooks if you would like to schedule multiple runbooks to run at the same time. To view or unlink a schedule, click the “Schedule” view for the runbook, or go to the Assets view.
Wrapping up
You should now be in expert in navigating the Azure Automation service to complete your runbook management tasks such as creating, running, configuring job streams, and viewing jobs. Happy automating!
Not an Azure Automation user yet? Sign up for the Preview and then check out the Getting Started Guide.
