WordPress is a light weight CMS that allows you to build dynamic websites in minutes. It is continually growing and improving as the most popular content management system and not just a blogging platform. Every Cloud hosting platform has its own best practices to get the most out of the platform. If you are running your WordPress site on LAMP or WAMP stack solution and wondering how can I migrate it to Azure Websites with ease and get all the benefits of the Cloud such as auto-scaling, load balancing , self-healing etc. ; then look no further as we now have a optimized version of WordPress in Azure Websites Gallery. The best practice for running WordPress site includes the following optimizations specific to Azure Websites platform:
- Using a high performing MySQL database. For ClearDB pricing plans, click here
- Using connection pooling with persistent connection to MySQL database as you are using a remote MySQL database service provided with ClearDB
- Using and Configuring Azure Storage to store your WordPress site’s media library content
- Using Jetpack to supercharge your WordPress site with powerful features available to WordPress.com users
- Include Auto-scale, Staged publishing, SSL, Custom domains, WebJobs (used for background process or CRON job for WordPress) and Backup & Restore website features
We have included all these optimizations within this gallery template for Scalable WordPress. In this tutorial, you’ll learn how to create a new scalable WordPress site from the Gallery and discusses some of the optimization based on the best practices for hosting WordPress sites on Azure Websites.
Create a website in the portal
- Login to the Azure Management Portal
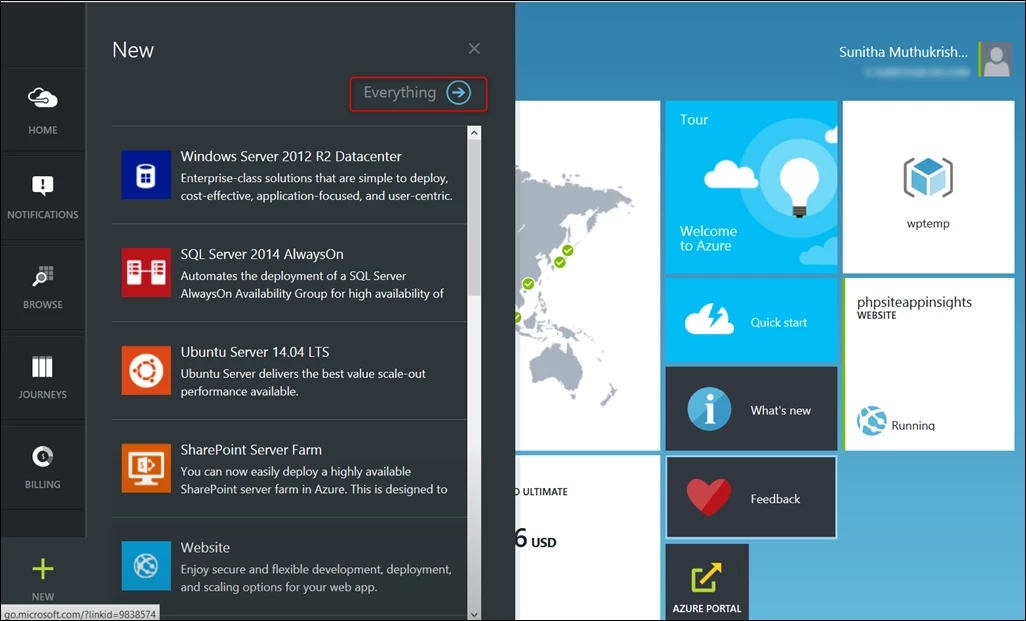
- Click the New icon on the bottom left of the dashboard
- Click on Everything link
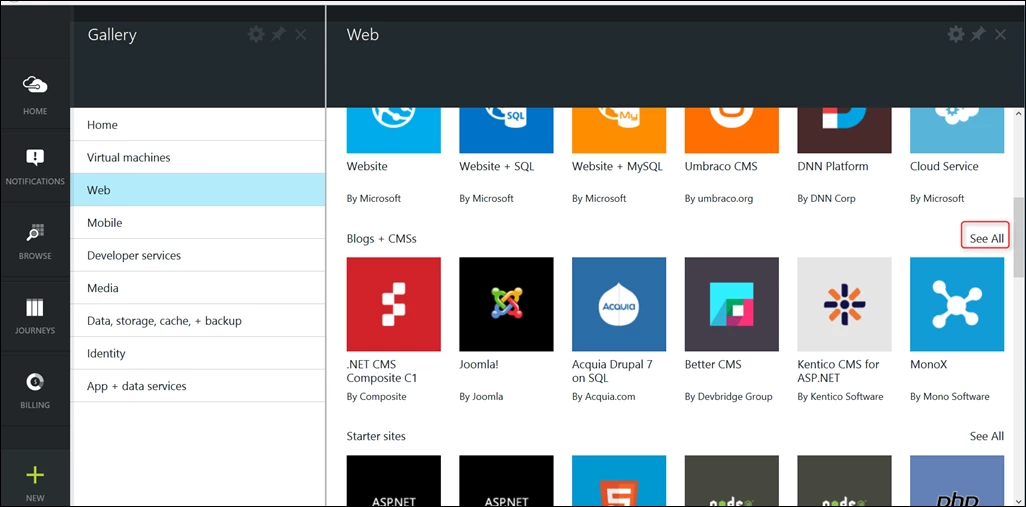
- Click on Web and Select See All for the category Blogs+CMSs
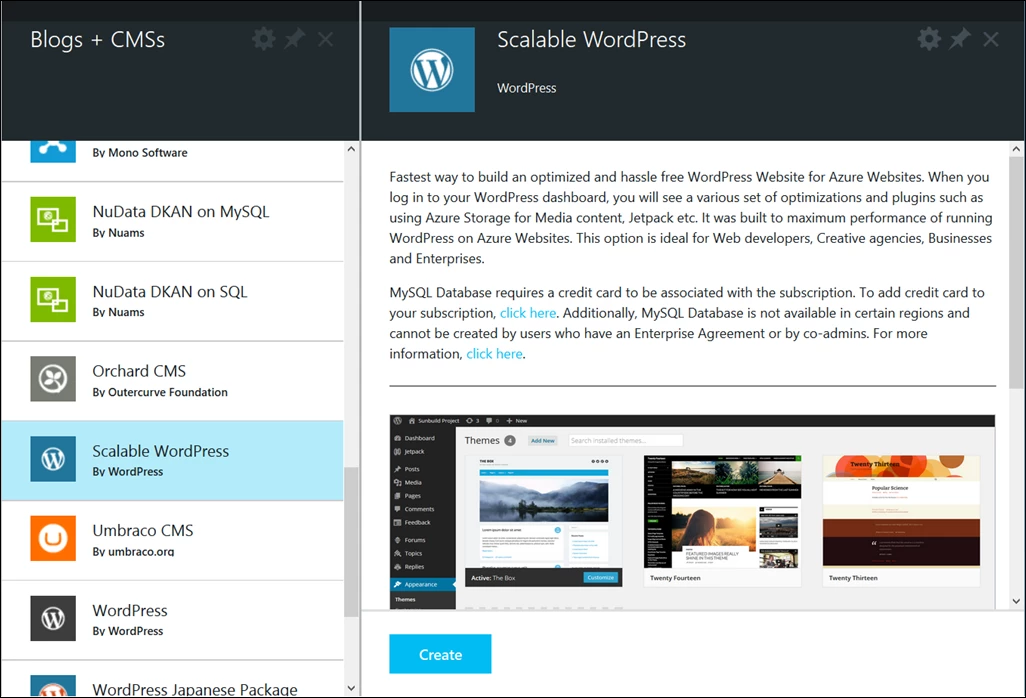
- Click on Scalable WordPress and Click on Create
- Enter the resource group name
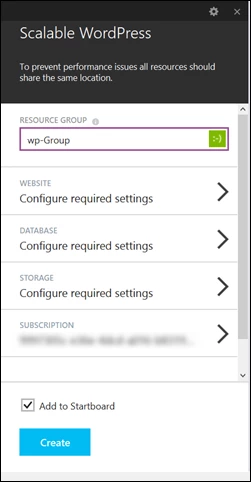
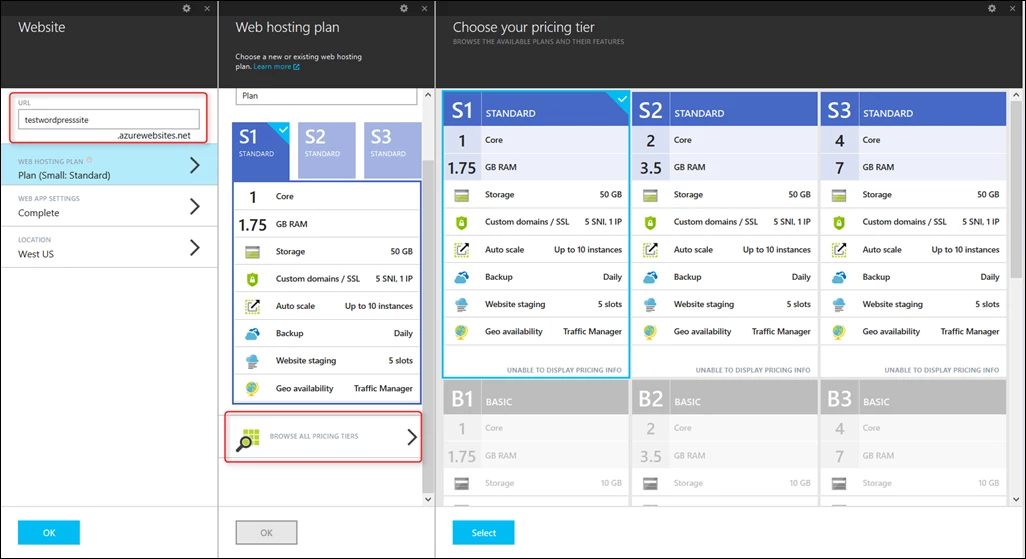
- Click on Website Configuration and enter the following information:
- Website name
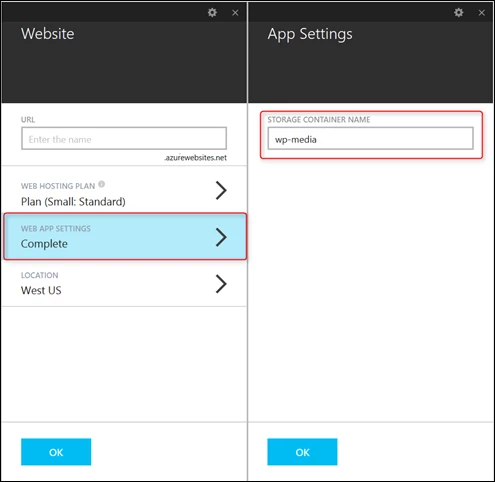
- Application settings which is the storage container name for your WordPress site to store all the Media library content such as images , videos etc. uploaded with WordPress media uploader
- Hosting Plan
Note: This application supports only the STANDARD tier of Websites and the other pricing tiers including SHARED, BASIC and FREE are not available for this application. - Region
- You can configure your the folder name to store your static media content with Web App Settings
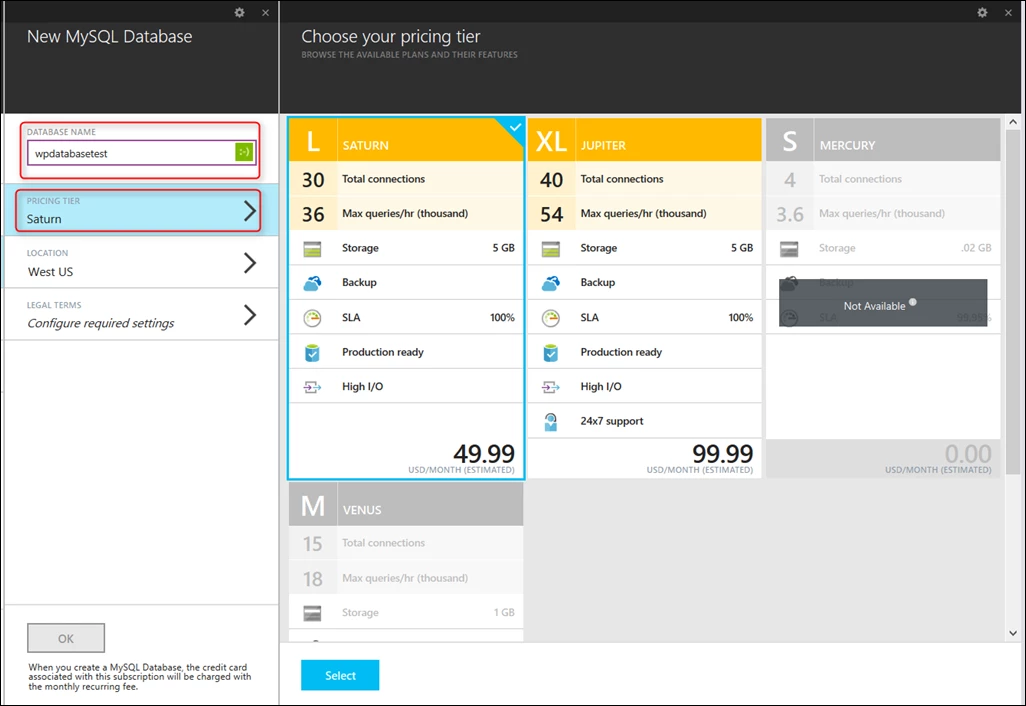
- Click on Database Configuration and enter the following information:
- Database name
- Region
- Plan
Note: This application supports only the recommended database tiers for this application: Saturn, Jupiter plans. All other lowers tiers are not support.
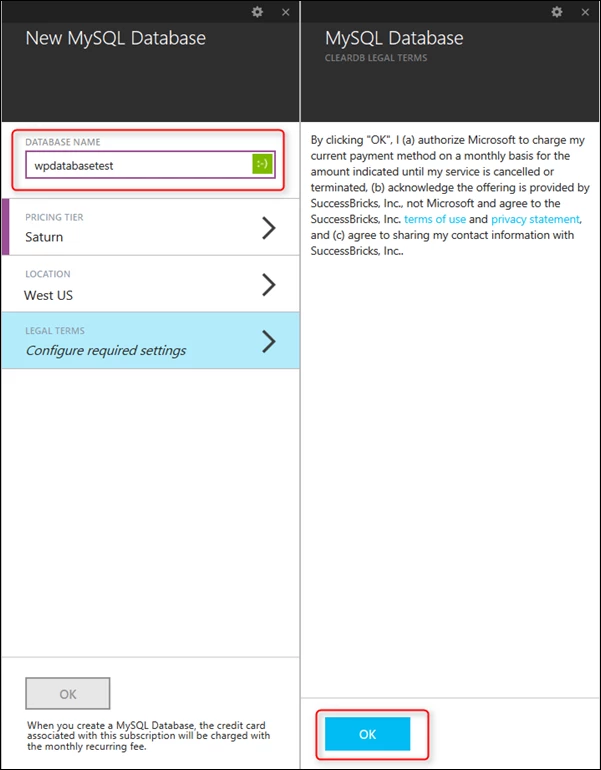
- Now accept the legal terms and conditions of ClearDB MySQL service
- Click on Storage configuration to either link a new or existing storage account to this resource group. For this tutorial, I am adding a new storage account to this resource group.Enter the following information:
- Storage account name
- Location
- Redundancy Type : Geo-Redundancy , Local Redundancy
- Turn on Diagnostics
Note: You can only choose storage account that use the same subscription as the other resources (Website, Database). Storage accounts from different subscription will be disabled.
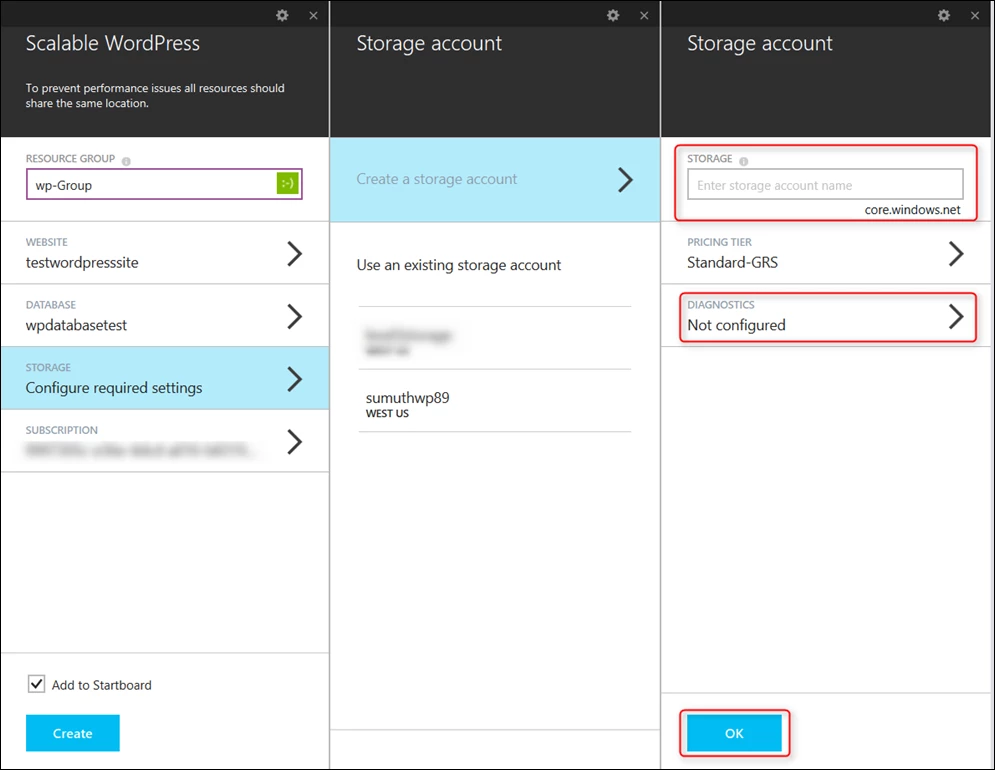
- Click on Subscription tab to choose the appropriate subscription for your resource group and finally Click on Create
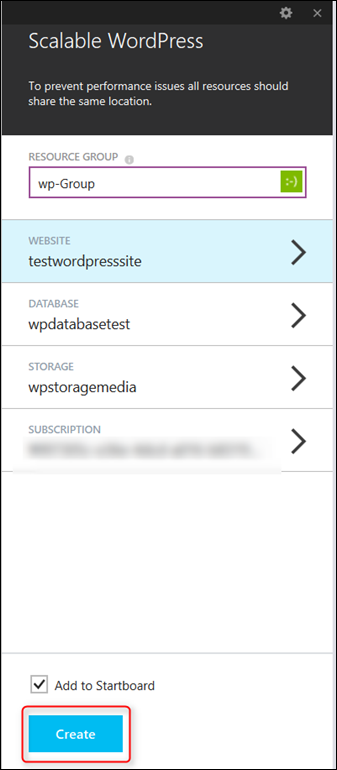
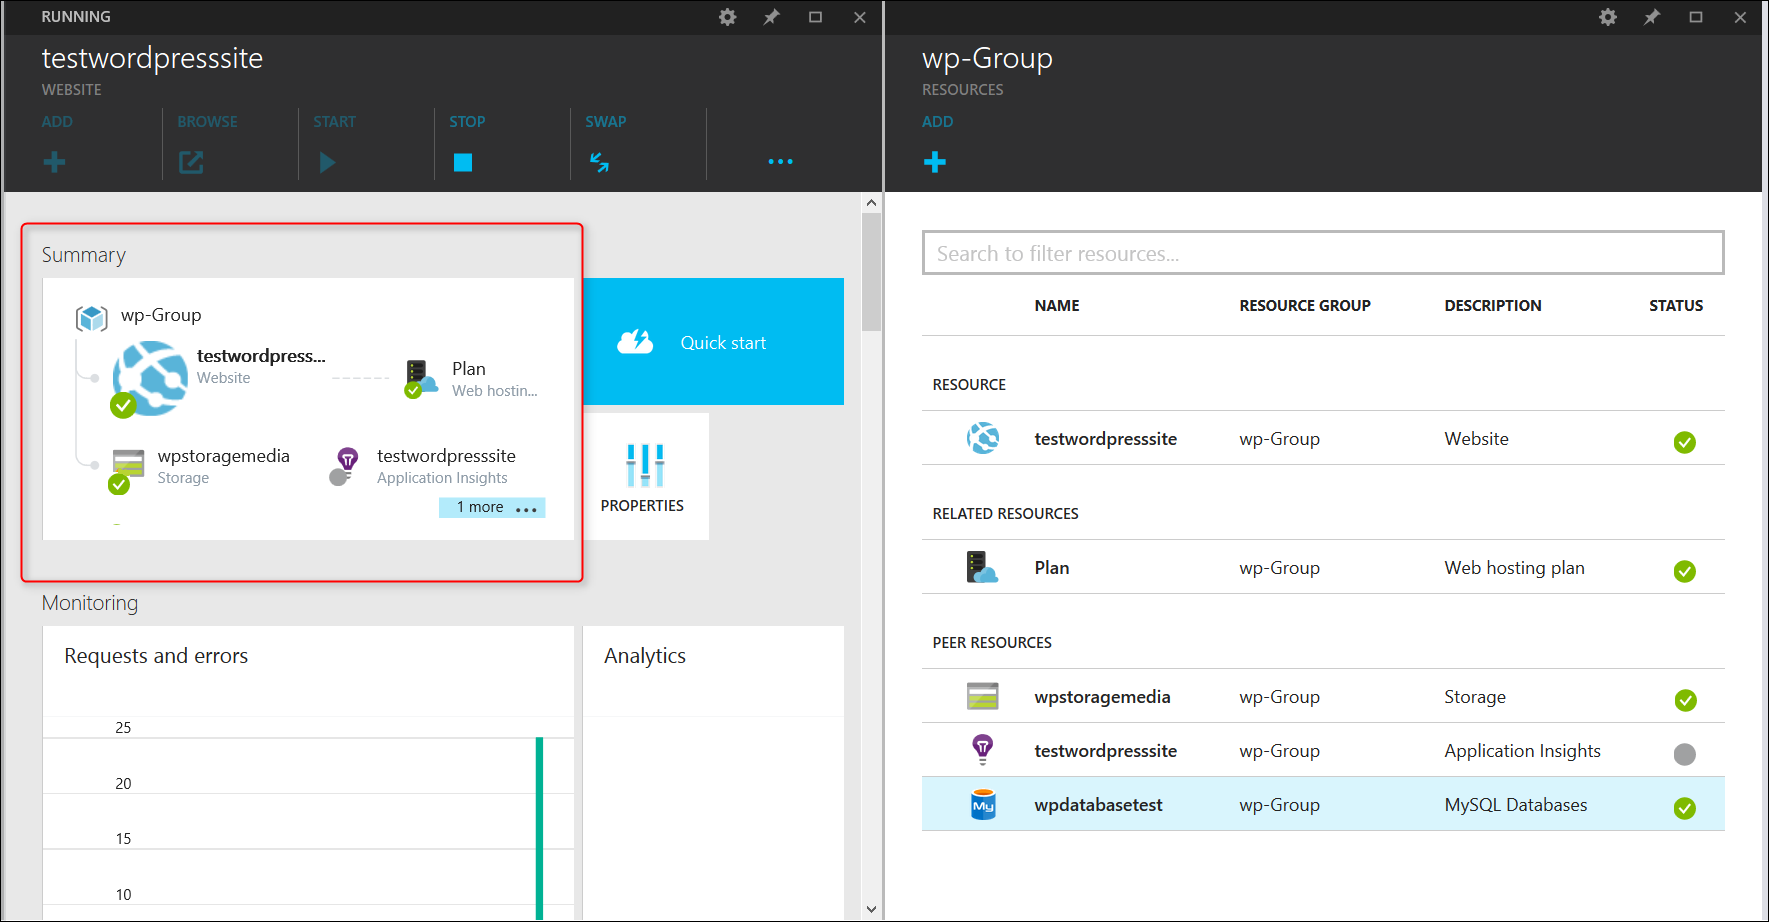
Now a new WordPress site is being deployed to Azure websites and will take a few minutes to create the resource group and provision Website, Database and Storage resources within this group. Once you are notified in the notifications section that the deployment went through successfully , click on newly created resource group item “WP-Group”on the dashboard to view your resource group: Website, Database and Storage.
Browse your WordPress site and complete the WordPress installer step in your browser by entering the information for:
- Title of your Site
- Admin user and password . Please Note: As a security best practice to follow these guidelines:
1 – DO NOT use ‘admin’ as the username and use a different unique string to avoid unauthorized attacks on your site
2 – USE a STRONG password for your site admin user
- Email address for admin user
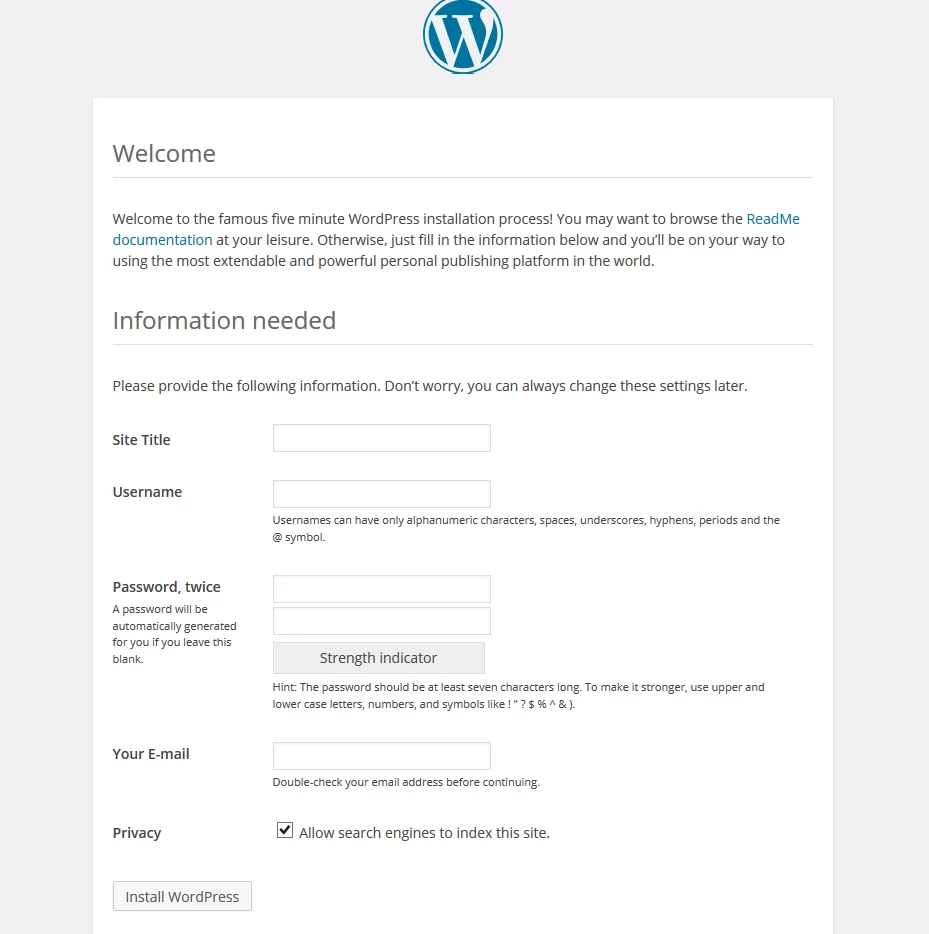
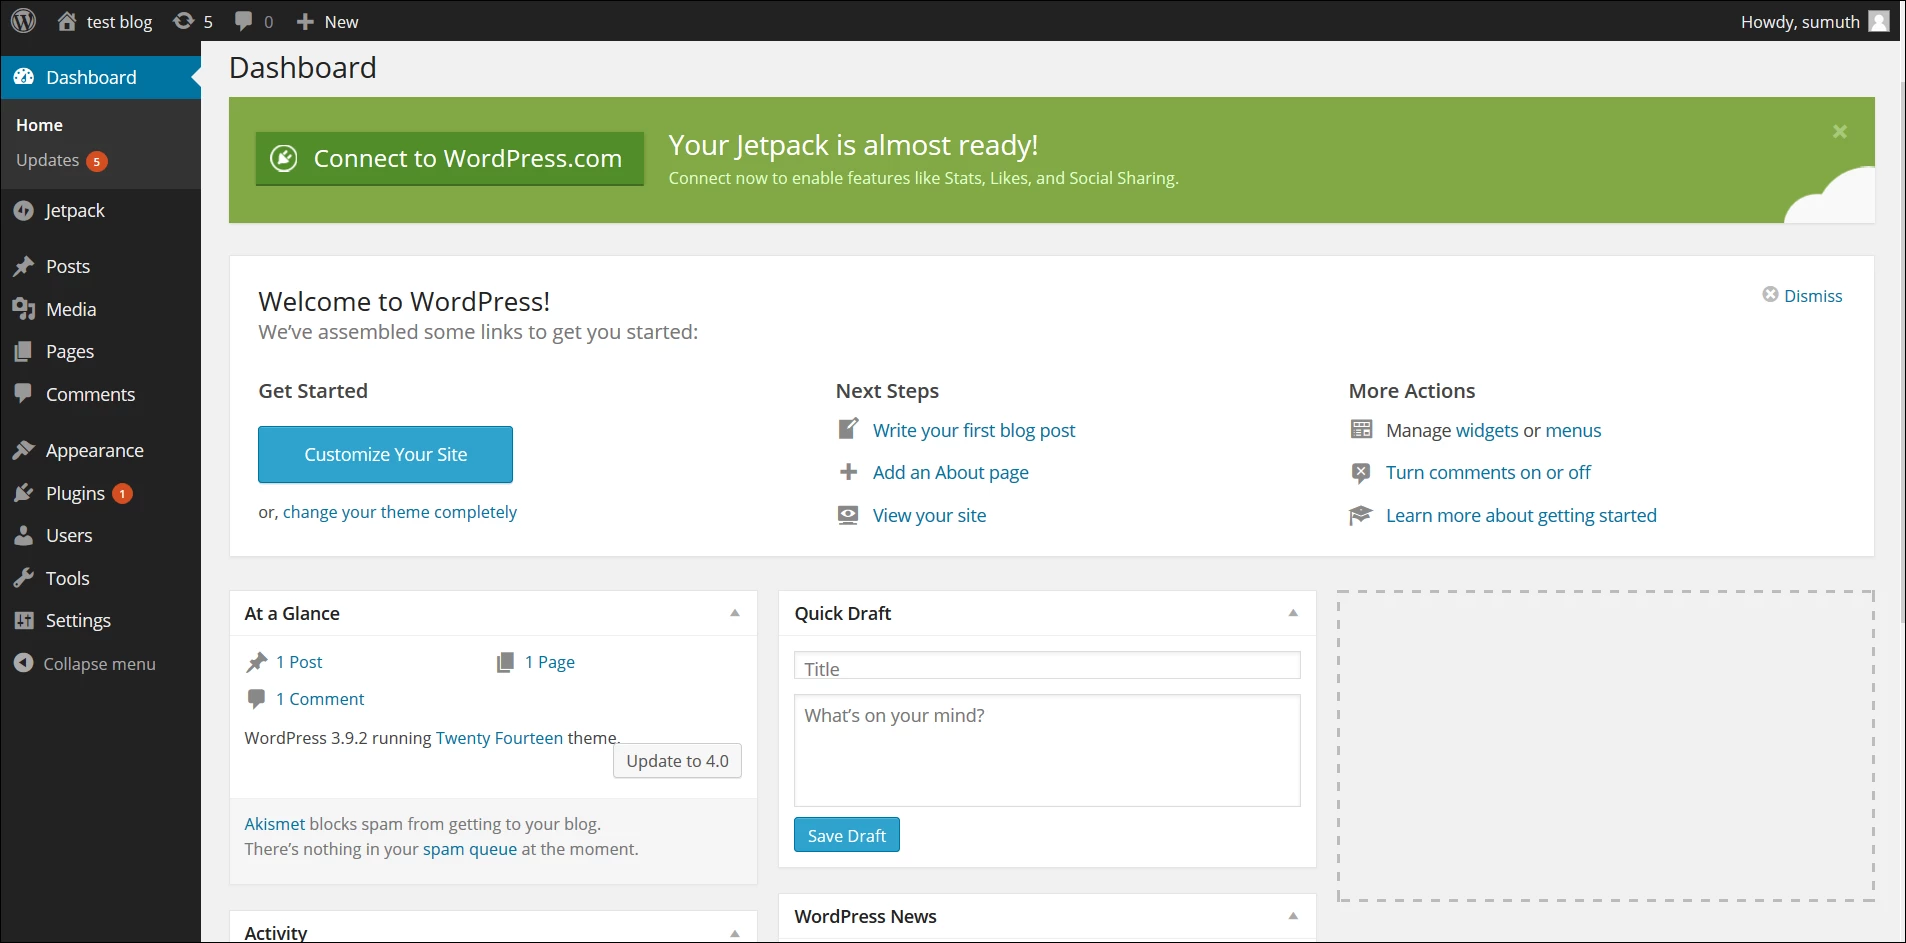
- Click on Install WordPress to complete the installation and now your website is ready to use. You can now login WordPress dashboard and start creating your content
Troubleshooting
- SMTP is not supported on Azure Websites. You can purchase a FREE plan from SendGrid available through the Azure portal under Azure Gallery –> App +Data services-> Integration category –> SendGrid to enabled email functionality in your WordPress site.You would also need to install SendGrid Plugin and configure it with your SendGrid credentials.
- SSL is not enabled by default. Click here to learn more on how to setup SSL for your Website and how to configure WordPress administration over SSL
- WordPress Multisite is not enabled by default. To enable Multisite , see How to configure a WordPress multisite
- Custom domain is supported with Azure websites. See How to configure custom domain on Azure website
- Auto-scaling is supported but not turned ON by default as this depends on your website traffic. It can be enabled and configured with just few clicks allowing you can scale up or scale out as needed based on your website traffic. See how to scale for Azure website
Conclusion
Azure Websites services currently hosts many high traffic WordPress sites which focus on:
- Easy to setup: In less than 5 minutes you have a WordPress site up and running
- Speed : Your Website is blazing fast pages take less than 2 seconds to load.
- Scalability : This configuration can easily service up to a million visits/page views per month
- Uptime : Various reasons can disrupt the content being served from the server to your browser , but Azure Websites offers a 99.9% uptime for your website. You can obviously setup multiple Azure websites with Azure Traffic Manger load balance across these websites for better performance as well as high availability.
You can now focus on your content and driving traffic to your website and not worry about configuring your WordPress application for Azure Websites.
