We are excited to announce production support of Cloudera Enterprise on Azure. Customers can now deploy Cloudera Enterprise, Data Hub Edition via the Azure Marketplace. In this new offering on Azure, Cloudera has expanded support in the following key areas:
- Support of Impala, HBase, Spark, and Solr components under all production workload types. This is suitable for higher resource-consuming services and production workloads running a variety of services.
- Support for configuration on DS12_V2, DS13, DS13_V2, DS14, DS14_V2, and DS15_V2 instance types with Premium Storage or Standard Storage VHDs attached for worker nodes.
- GS4 and GS5 instance types are supported with Premium Storage VHDs attached for worker nodes.
- Support for Cloudera Director deployment from Azure Marketplace.
Cloudera Enterprise with DS13 or DS14 instances can be deployed with a single click from Azure Marketplace or from a Azure Resource Management template hosted on GitHub. All instance types can also be deployed from Cloudera Director with additional level of control for customization. Note that only Premium Storage is currently supported for master nodes.
About Cloudera
Cloudera provides an enterprise-ready, open source distribution that includes Apache Hadoop and related projects. Cloudera Enterprise includes CDH, the world’s most popular open source Hadoop-based platform, as well as advanced system management and data management. This massively scalable platform unites storage with an array of powerful processing and analytics frameworks and adds enterprise-class management, data security, and governance. Cloudera Enterprise includes core elements of Hadoop (HDFS, MapReduce, YARN) as well as HBase, Impala, Solr, Spark and more.
Cloudera Enterprise Architecture on Azure
The Cloudera cluster consists of virtual machine instances for both worker nodes and master nodes. All nodes are deployed in an Azure Virtual Network so that they can communicate with one another. Access to the nodes is protected with Network Security Groups (NSG) both at the subnet level and VM level. Edge nodes can be deployed separately to directly access the cluster’s internal network.
The nodes are provisioned with a CentOS 6.7 based Cloudera VM image. This image is configured for optimizing performance of Cloudera workload. Other than GS instances which only support Premium Storage, each worker node can have either Premium Storage or Standard Storage disks attached. Each master node has three 512GB Premium Storage disks. In addition, there is a 512GB disk attached for logs per node. Each node is in its own Azure Storage Account to maximize throughput.
A cluster of minimum four nodes, including three worker nodes and one master node, can be deployed for evaluation purpose. Production deployment consists three master nodes and three to 90 worker nodes. High Availability (HA) is supported by provisioning a standby master node.
Refer to this whitepaper for more details on Cloudera architecture on Azure.
Cloudera Enterprise Deployment on Azure Marketplace
To deploy a Cloudera cluster on Azure using the Marketplace template, you will need to have a sufficient number of CPU cores in your Azure subscription. The cluster deploys a minimum of four DS13 VMs, each with 8 cores. So a minimum of 32 cores are needed. To request an increase of quota for cores, open a support ticket and state the number of cores you need, the region you need them in, and specify that the cores are for Azure Resource Manager.
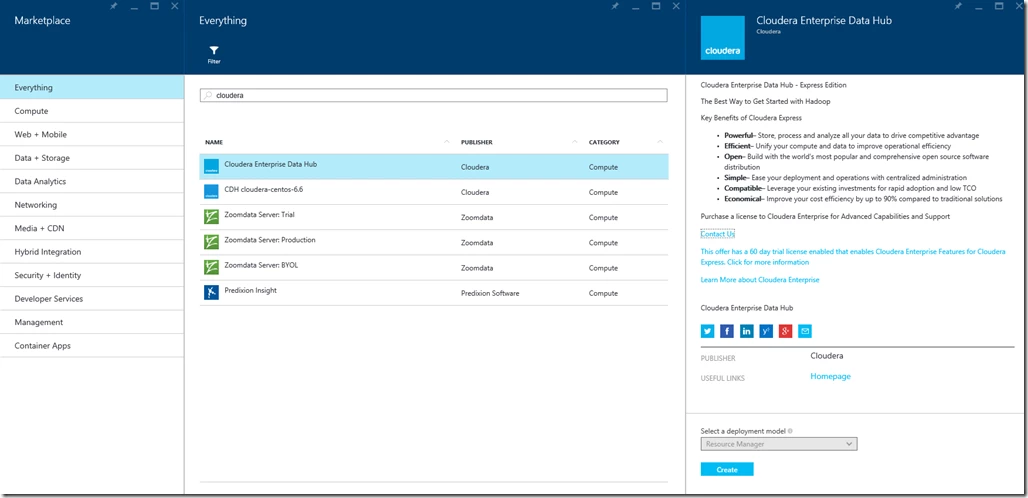
You can find the Cloudera Enterprise offering in the Azure Marketplace by navigating to Marketplace in the Azure portal, and searching for Cloudera:
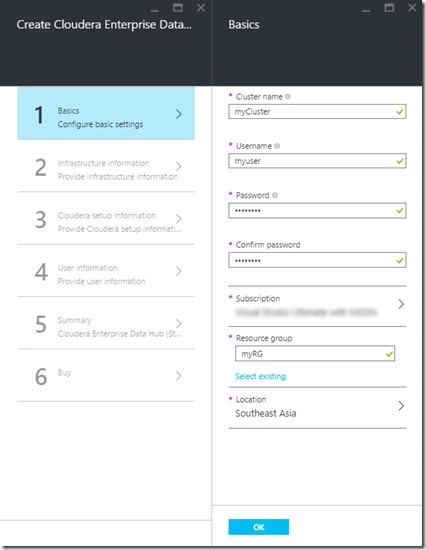
Step 1: Follow the wizard to enter the “Basics” configuration for the cluster deployment such as cluster name, VM credentials, and resource group as shown below:
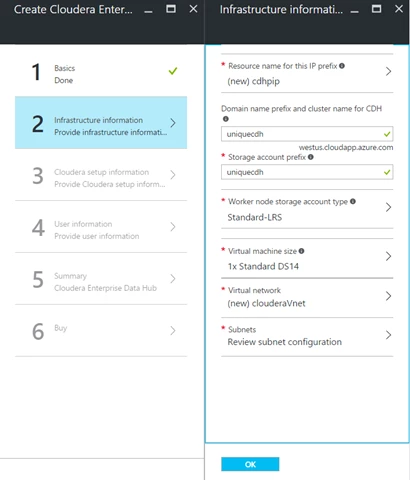
Step 2: Specify network, storage, and virtual machine configurations for the cluster:
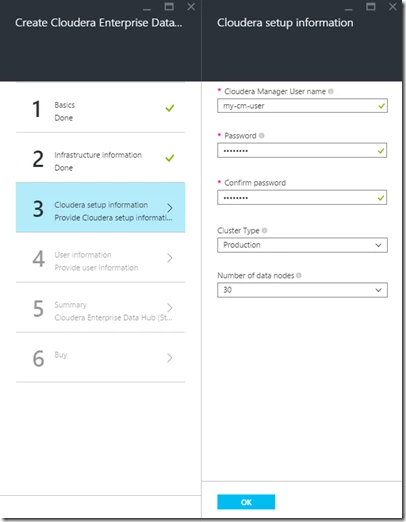
Step 3: Enter Cloudera Manager credentials and cluster size:
Step 4: Enter user information. Please reference privacy statement for details about how user information is used:
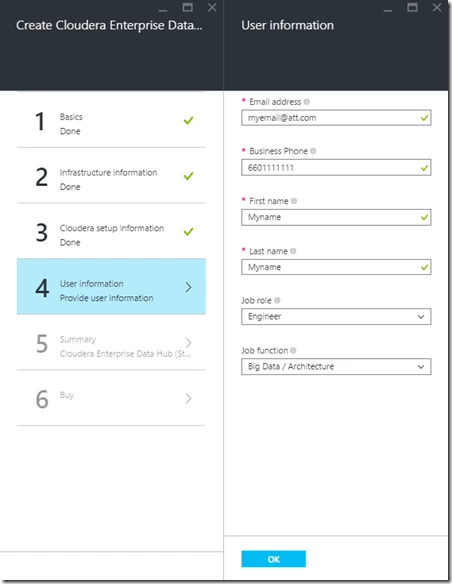
Step 5: Review summary:
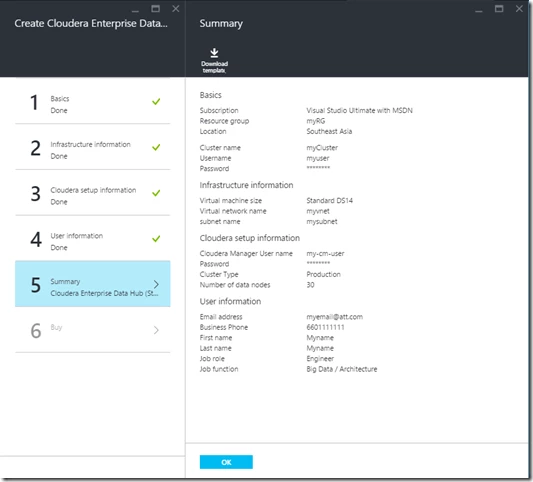
Step 6: Purchase and deploy the cluster:
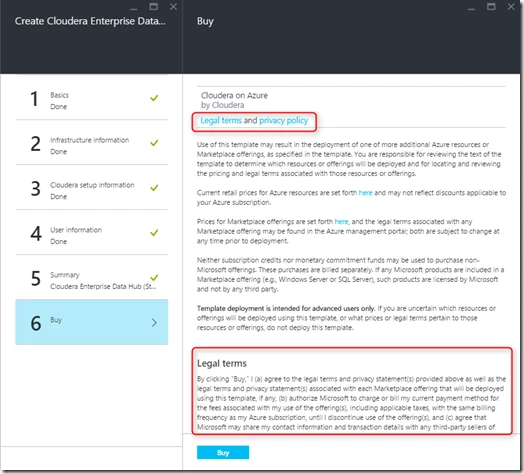
Accessing the Provisioned Cloudera Cluster
After the cluster is provisioned successfully, create a SSH tunnel to access the Hadoop endpoints on the Azure VNet. For example, follow the instructions on Windows or on MacOS and Linux to set up a SSH tunnel to the master node [dnsName]-mn0, then access Cloudera Manager at https://localhost:7180 using the Cloudera Manager user name and password specified during deployment.
Troubleshooting Tips
If you run into an error during deployment, please navigate to the resource group that contains the Cloudera cluster in the Azure portal:
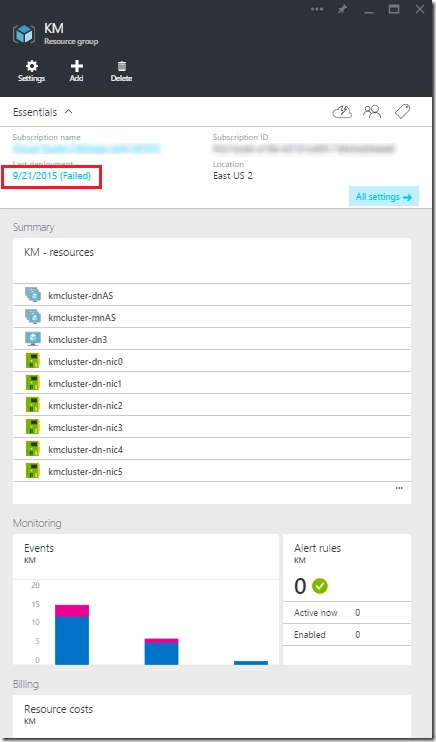
Click on the failed deployment:
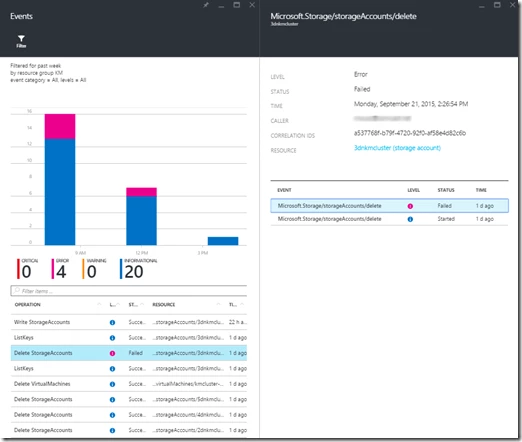
Scroll down to find the oldest failed event, click on it to see the detailed error:
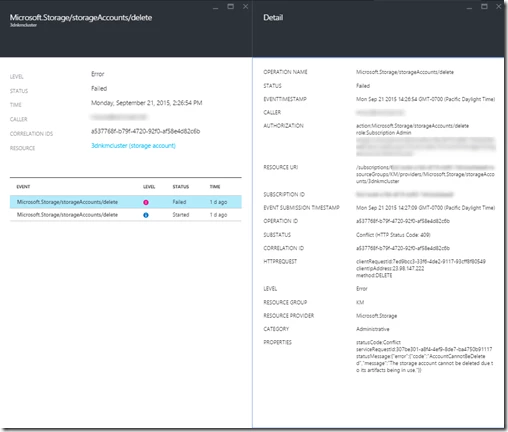
If the error appears to be transient, you may remove the resource group if it doesn’t contain any other resources created outside the Cloudera cluster deployment, and try again.
Cloudera Enterprise Deployment from GitHub
If you need a greater level of customization when deploying a Cloudera cluster, you can find this Azure Resource Management template published on GitHub. You can click on the “Deploy to Azure” button to deploy the cluster with a similar experience as deploying from Marketplace, except more parameters are exposed, for example, the address space for virtual network and subnet. You can also use Azure PowerShell or Azure Cross Platform Client Tool to deploy the template.
If you need to customize sub templates for master nodes or data nodes, for example, change the number of disks attached to each node, then download all the template files and scripts from GitHub, modify them as needed, and upload to your own GitHub repo. Finally, change the variable “scriptsUri” in AzureDeploy.json to point to your GitHub repo. You can also use Cloudera Director to customize your deployment. For details on deploying a cluster using Cloudera Director on Azure, please refer to this document.
