If you’re a user of Azure Automation, you already know how useful it can be for automating manual, long running, frequently repeated, and error prone tasks that keep your cloud services up and running. You may also be well aware that there are a number of steps required to get Azure Automation set up to talk to Azure using certificate-based authentication. Well we on the Azure Automation and Azure PowerShell team are happy to present you with an easier alternative – Azure Automation can now authenticate to Azure using Azure Active Directory organizational identity credential-based authentication. Note: Microsoft account credentials– formerly known as LiveIDs – will not work in Azure Automation.
Configuring Azure for management through Azure Active Directory authentication
Azure Automation now ships with the Azure PowerShell module of version 0.8.6, which introduced the ability to non-interactively authenticate to Azure using OrgId (Azure Active Directory user) credential-based authentication. Using the steps below, you can set up Azure Automation to talk to Azure using this authentication type.
Find the Azure Active Directory associated with the Azure subscription to manage:
- Log in to the Azure portal as the service administrator for the Azure subscription you want to manage using Azure Automation. You can find this user by logging in to the Azure portal as any user with access to this Azure subscription, then clicking Settings, then Administrators.
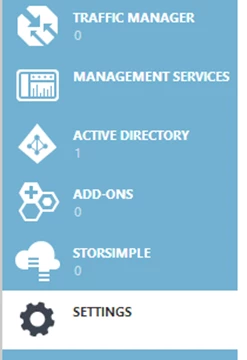

- Note the name of the directory associated with the Azure subscription you want to manage. You can find this directory by clicking Settings, then Subscriptions.
Create an Azure Active Directory user in the directory associated with the Azure subscription to manage:
You can skip this step if you already have an Azure Active Directory user in this directory. and plan to use this OrgId to manage Azure.
1. In the Azure portal click on Active Directory service.

2. Click the directory name that is associated with this Azure subscription. If you cannot see the directory or do not have permissions to access the directory, either log in as a user who has read/write access to this directory, or change the directory associated with the Azure subscription that you want to manage (Settings -> Subscriptions -> Edit Directory).

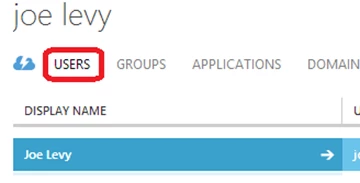
3. Click on the Users tab and then click the Add User button.

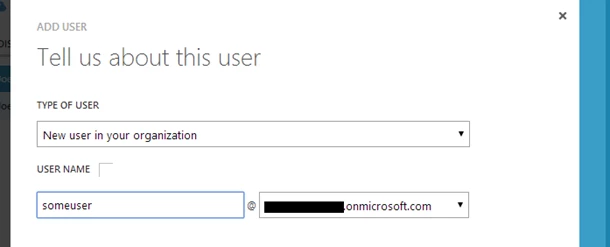
4. For type of user, select “New user in your organization.” Enter a username for the user to create.
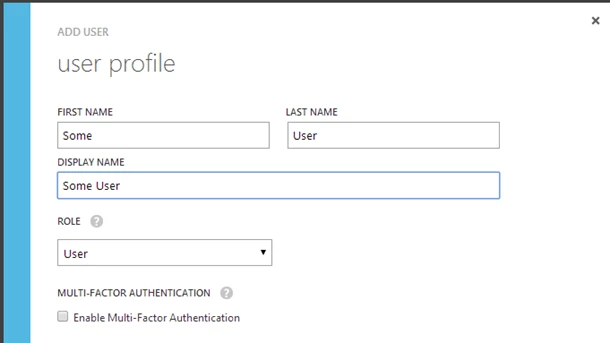
5. Fill out the user’s profile. For role, pick “User.” Don’t enable multi-factor authentication. Multi-factor accounts cannot be used with Azure Automation.
6. Click Create.
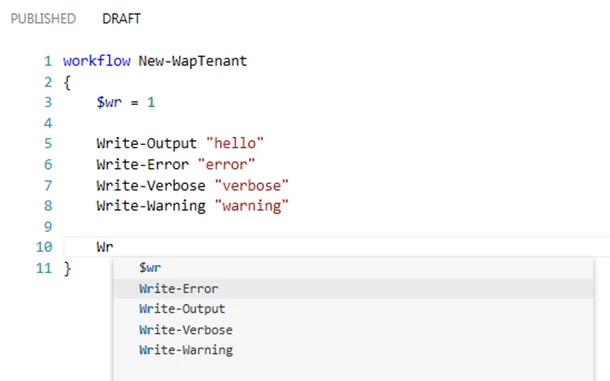
7. Jot down the full username (including part after @ symbol) and temporary password.
Allow this Azure Active Directory user to manage this Azure subscription
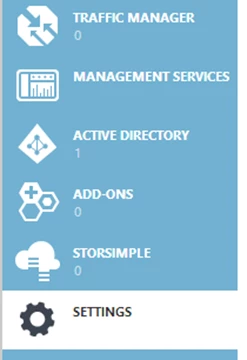
1. Click on Settings (bottom Azure tab under StorSimple)

2. Click Administrators
3. Click the Add button. Type the full user name (including part after @ symbol) of the Azure Active Directory user you want to set up to manage Azure. For subscriptions, choose the Azure subscriptions you want this user to be able to manage. Click the check mark.

Change the Azure Active Directory user’s password from a temporary password
1. Log out of Azure.
2. Log in to Azure as the Azure Active Directory user you just created, using full username (including part after @ symbol) and temporary password.
3. You will now be prompted to change the user’s password.
Configure Azure Automation to use this Azure Active Directory user to manage this Azure subscription
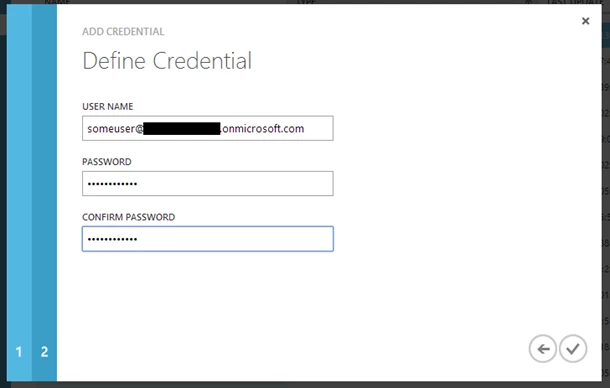
1. Create an Azure Automation credential asset containing the username and password of the Azure Active Directory user that you have just created. You can create a credential asset in Azure Automation by clicking into an Automation Account and then clicking the Assets tab, then the Add Setting button.

Managing Azure from Azure Automation runbooks
Once you have set up the Azure Active Directory credential in Azure and Azure Automation, you can now manage Azure from Azure Automation runbooks using this credential. Below is an example runbook which grabs the Azure Active Directory credential from the Automation asset created earlier and uses it to view all virtual machines in the Azure subscription.
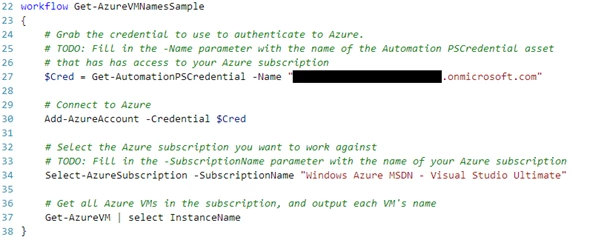

When using this runbook, for the SubscriptionName parameter of Select-AzureSubscription enter the name of the Azure subscription you want to work against. Make sure the Azure Active Directory user you are using to authenticate has been granted administrator access to this subscription (the process for this is described above).
You can find the names of your Azure subscriptions in the Settings tab of the Azure portal:

You can grab the above example runbook from ScriptCenter here.
While the original way of authenticating from Azure Automation to Azure, using management certificates, is still possible via the Connect-Azure runbook, this runbook is now deprecated and organization identity credential-based authentication using Azure Active Directory should be used instead.
Conclusion
You should now be all set to manage your Azure services with an Azure Active Directory OrgID user and Azure Automation. Going forward, it should be easier to get up and running creating runbooks to automate your cloud processes. As part of this update, we’ve also updated all of our Azure Automation sample and utility runbooks to use this authentication to make it easy to not just get set up but also leverage existing content in our Runbook Gallery.
Until next time – Keep Calm and Automate On (using Azure Active Directory!)
Just getting started with Azure Automation? Learn about the service here, and follow Azure Automation on Twitter.
Want to get in contact with me, personally? Reach out via my blog or follow me on Twitter.

