Microsoft Cognitive Services enables developers to augment the next generation of applications with the ability to see, hear, speak, understand, and interpret needs using natural methods of communication. Think about the possibilities: being able to add vision and speech recognition, emotion and sentiment detection, language understanding, and search, to applications without having any data science expertise.
Today, we are excited to announce several service updates:
- We’re continuing our momentum on Azure Bot Service and Language Understanding Intelligent Service, which are going to be in general availability by the end of this calendar year.
- Text Analytics API regions and languages – Since the beginning of November, Text analytics API is now available in new regions: Australia East, Brazil, South Central US, East US, North Europe, East Asia, West US 2. We are also releasing new languages for key phrases: Swedish, Italian, Finnish, Portuguese, Polish and Dutch.
- Translator API – A year ago, Microsoft Translator launched its neural network powered languages called neural machine translation (NMT). Neural networks capture the context of full sentences with high quality translation and more human-sounding output. Today, the Microsoft Translator team is announcing several developments in the Neural Machine Translation technology, making advanced AI translations more accessible (don’t hesitate to refer to the detailed announcement blog post):
- 10 new languages are now available for Neural Machine Translation, for a total of 21 supported languages, in both Translator Text API, Translator Speech API and in Microsoft Translator apps and services. The 10 new languages cover Bulgarian, Czech, Danish, Dutch, Hindi, Norwegian, Portuguese, Romanian, Swedish, Turkish.
- All of the API traffic for Chinese and Hindi is now powered by Neural Machine Translation. This means that developers do not need to call the “generalnn” category in their apps to benefit from these new systems.
- New “hybrid” translation is available for APIs and apps users alike, bringing benefits of neural translations to languages not yet available on NMT. When only one of the two languages you are translating to or from is Neural Machine Translation-powered, you will still see an increase in translation quality as Microsoft Translator will automatically use NMT for that section of the translation – this portion of the translation will improve, making the entire translation better.
- Speech translation is now powered end to end with Long Short Term Memory (LSTM) technology. This has a direct impact on the quality of the machine translation, since the more accurate the speech recognition is, the more accurate the resulting translation will be.
- Neural Machine Translation is now also available as an on premises service – More information about Microsoft Translator’s on premises offering.
- Custom Vision model export – We are excited to announce the availability of mobile model export for Custom Vision Service. This new feature will allow you to embed your classifier directly in your application and run it locally on your device. The models you export will be optimized for the constraints of a mobile device, so you can easily classify on your device in real time. In addition to hosting your classifiers at a REST endpoint, you can now export models to run offline, starting with export to the CoreML format for iOS 11. We’ll be able to export to Android as well in a few weeks. With this new capability, adding real time image classification to your mobile applications has never been easier. More on how to create and export your own Custom Vision Model is below.
How to create and export your own Custom Vision Model
Let’s dive into the new custom vision features and how to get to started.
Custom Vision Service is a tool for easily creating your own custom image classifier by training, deploying, and improving it. With several images per category you’re looking for, you can get started to create and train your own image classifier in a few minutes.
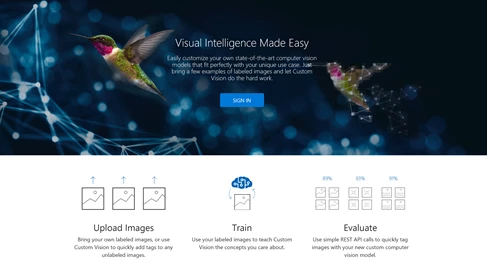
On top of hosting the classifier you trained at a REST endpoint, it is now possible to export models to run offline, starting with export to the CoreML format for iOS 11.
First, let’s build our classifier. You’ll need to have :
- A valid Microsoft Account or an Azure Active Directory OrgID (“work or school account”), so you can sign into customvision.ai and get started (Note that OrgID login for AAD users from national clouds is not currently supported)
- A set of images to train your classifier (you should have a minimum of 30 images per tag).
- A few images to test your classifier after the classifier is trained.
Starting your classifier
- In the previous post presenting Custom Vision Service, we had presented how to quickly create an image classifier by coding each step.
- For this time, let’s try it with the Custom Vision Service UI. First, let’s access to the Custom Vision Service site at: https://customvision.ai.
- Click New Project to create your first project;
- The New Project dialog box appears and lets you enter a name, description and select a domain.
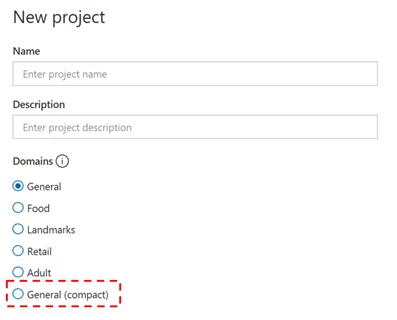
In order to be able to export your classifier, you’ll need to select a compact domain. Please refer to the full tutorial for detailed domains explained.
Adding images to train your classifier
- Let’s say you want a classifier to distinguish between dogs and ponies. Even if the system minimum would be with five images per category, you would need to upload and tag at least 30 images of dogs and 30 images of ponies.
- Try to upload a variety of images with different camera angles, lighting, background, types, styles, groups, sizes, etc. We recommend variety in your photos to ensure your classifier is not biased in any way and can generalize well.
- Click Add images
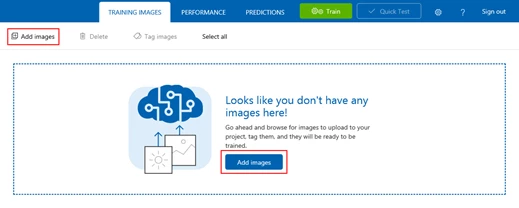
- Browse to the location of your training images.
Note: You can use the REST API to load training images from URLs. The web app can only upload training images from your local computer.
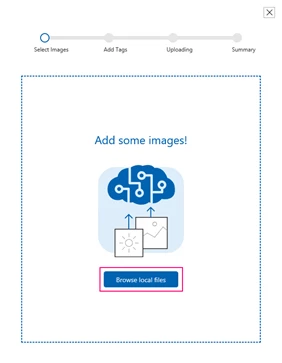
- Select the images for your first tag by clicking Open to open the selected images.
- Once selected, you’ll assign tags by typing in the tag you want to assign, then pressing the + button to assign the tag. You can add more than one tag at a time to the images.
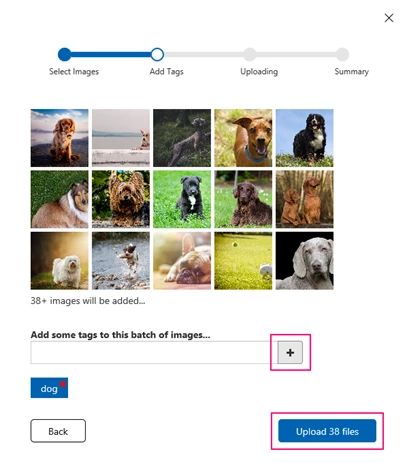
- When you are done adding tags, click Upload [number] files. The upload could take some time if you have a large number of images or a slow Internet connection.
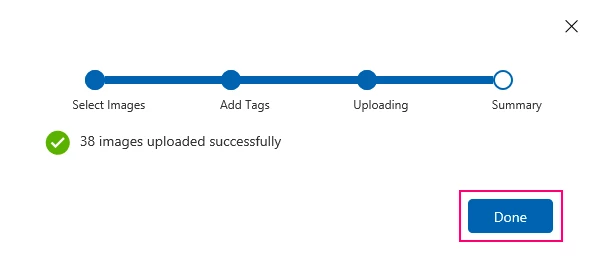
- After the files have uploaded, click Done.
Train your classifier
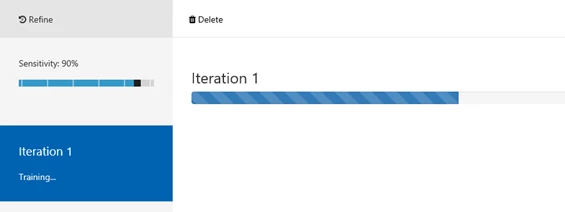
After your images are uploaded, you are ready to train your classifier. All you have to do is click the Train button.
![]()
It should only take a few minutes to train your classifier.
The precision and recall indicators estimate you how good your classifier is, based on automatic testing. Note that Custom Vision Service uses the images you submitted for training to calculate these numbers, using a process called k-fold cross validation.
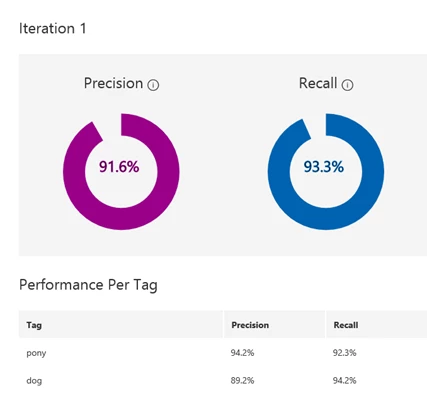
Note: Each time you hit the Train button, you create a new iteration of your classifier. You can view all your old iterations in the Performance tab, and you can delete any that may be obsolete. When you delete an iteration, you end up deleting any images uniquely associated with it.
The classifier uses all the images to create a model that identifies each tag. To test the quality of the model, the classifier then tries each image on its model to see what the model finds.
Exporting your classifier
- Export allows you to embed your classifier directly in your application and run it locally on a device. The models you export are optimized for the constraints of a mobile device, so you can classify on device in real time.
- In the case you previously had an existing classifier, you need to convert it to a compact domain, please refer to this tutorial.
- Once your project has finished training in the previous section, you can export your model:
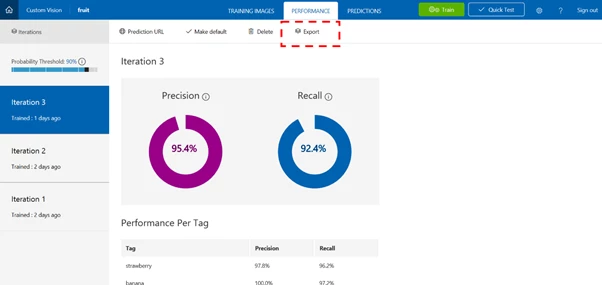
- Go to the Performance tab and select the iteration you want to export (probably your most recent iteration.)
- If this iteration used a compact domain, an export button appears at the top bar.
- Click on export, then select your format (currently, iOS/CoreML is available.)
- Click on export and then download to download your model.
Using the exported model in an iOS application
Last step, please refer to the Swift source of sample iOS application for models exported from Custom Vision Service and the demo CoreML model with Xamarin.
Happy coding!
– The Microsoft Cognitive Services Team
