How to, Management and Governance, Microsoft Azure portal
Getting Started with Live Streaming Using the Azure Management Portal
Posted on
14 min read
Earlier today we announced the availability of our public preview of Azure Media Services live services. These are the same live services that NBC Sports has used to deliver their multi-platform live coverage of their sports properties including English Premier League, NHL hockey, Sunday Night Football, and the Sochi Olympics. It is also the live services that were used by 10 world-wide broadcasters during the recently concluded FIFA World Cup. Thus we are very confident with the stability, scalability, and performance of these services and are excited to make them now available to all Media Services users!
We will have many posts this week covering different aspects of our live streaming capabilities and how to use them. In this post, I’ll give you some of the basics of live streaming and will then apply them to a specific scenario (a live desktop webcast). In my post I will do everything using our management portal without any code then later in the week we’ll have another post showing how to automate the same actions using our SDK.
Basic Components of Live Streaming
I’ll start by giving you an overview of the basic components of the end to end solution that we’ll assemble in the instructions later in this post.
- Azure Account and Subscription- If you don’t yet have a Microsoft Azure account you will first need to create one by going to https://azure.com, there is a free trial available if you want to try before you buy.
- Azure Media Services Account- If you don’t yet have a Media Services account there are some instructions on how to create one at https://azure.microsoft.com/en-us/documentation/articles/media-services-create-account/
- Video Camera- In my case I’ll use the web cam on my laptop but just about any camera will work. If it has a digital output like USB you should be able to connect it directly to your PC to encode its output, if not you’ll need a video capture card.
- Live Encoder- Currently Azure Media Services supports two live ingest protocols, fragmented MP4/Smooth Streaming and RTMP. RTMP has become very pervasive and thus there are a large range of options including free encoders like Flash Media Encoder or FFMPEG, inexpensive encoders like Wirecast, high production value products like NewTek’s Tricaster, all the way up to professional grade encoders from Cisco, Elemental, Image, etc. For the sample below I will use my laptop with a copy of Telestream’s Wirecast installed. If you don’t have an encoder already you can download a copy of Wirecast from their site and they offer a trial license. Note that video encoding is a very CPU intensive operation so since I’m doing the encoding on my laptop I’ve limited my encoding to three quality levels and relatively low bit rates. If you’re going to be using a laptop or other PC with fairly low CPU horsepower you should monitor CPU utilization, if it is consistently above ~70% you should remove a quality level or lower the bitrates and resolutions of your encoding profiles.
- High Speed Internet Connection- To push out live video you need an internet connection which has a fairly stable outbound speed at least 1.5x the bit rate of the video you want to send to us, to account for fluctuations in the bit rate of the encoder’s output. So for example in the solution we build below I am using three quality levels (“renditions”) of my live stream, 400, 600, and 900 Kbps, combined the aggregate bitrate is 1900Kbps so I need to have at least 2850Kbps (2.85Mbps).
- Azure Media Services Channel- Channels are the only thing new in Azure Media Services which enables live streaming. They are the component within our service which provides you with an ingest point for the output of your encoder.
- Azure Media Services Asset- An Asset in Media Services is the container for storing all audio and video as well as metadata associated with your stream.
- Azure Media Services Program– A Program is an entity in Azure Media Services that you create on a channel in order to start writing the stream being received on the Channel to an Asset.
- Azure Media Services Streaming Locator- You create a Locator on an Asset when you want to make it available for streaming.
- Azure Media Services Streaming Endpoint and Streaming Units- A Streaming Endpoint provides you with a URL from which you can pull your live and VOD assets. Streaming Endpoints also provide our dynamic packaging capabilities and secure the delivery of the streams. Streaming Units are provisioned into Streaming Endpoints to provide it with a guaranteed maximum amount of throughput. Each Streaming Unit provides 200Mbps of streaming egress capacity and you can add more to your Streaming Endpoint as needed to increase its capacity.
- Azure CDN- In the very near future we will be directly integrating Azure CDN with Azure Media Services. When done there will be a new setting on Streaming Endpoints that will allow you to specify if you want us to automatically provision a CDN endpoint connected to your Streaming Endpoint. In the meantime you can stream directly from your Streaming Endpoint or contact us through Azure support to have us setup Azure CDN for your Streaming Endpoint.
- Video Player- Azure Media Services Streaming Endpoints provide dynamic packaging capabilities which enables you to output your live stream using the streaming protocols needed for each of the devices you want to reach. In the solution we’ll build below I will use an HTML5/DASH.js player with MPEG-DASH for all platforms (desktop browser, Android, and Windows Phone) other than iOS where I will use HLS version 3. For more information on our dynamic packaging capabilities take a look at Nick’s Channel9 video and our MSDN documentation.
Our Scenario: A Webcast Event
Let’s now get started by explaining a bit about the scenario we’ll implement below. In the steps below we’ll build out a solution for doing a desktop webcast that could be used to broadcast training from my PC’s webcam. This webcast will be an “event” which in live streaming terminology means that it is a live stream that will have a beginning and end. This is in contrast to a “linear” stream which runs indefinitely like the channels on your TV which are always on, in a later blog post we’ll cover how to use our live services for linear streams.
Pre-Event Setup
Below are a set of pre-event setup steps that will get us ready to run our event. These steps can be taken at any point before the event to get everything provisioned, there’s no need to rush through them directly before you want to go “on-air”.
Creating an Azure Media Services Channel and Steaming Endpoint
In this first set of steps we’ll use the Azure management portal to provision the infrastructure needed to receive the live stream from the encoder and to stream and package it for delivery to all of our client playback devices.
- Open the Azure management portal by navigating to https://azure.com then click on “Portal” in the top menu bar. After logging in with your Microsoft ID you’ll be placed into the management portal.
- In the left side vertical menu strip click on the “MEDIA SERVICES” menu item. This will cause a list of all Media Services accounts you have created to open on the right.
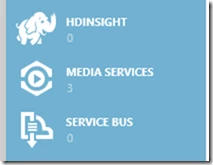
- Click on the Media Services account you want to use to build this sample, in my case I’m using a Media Services account I created called “jasonblog”. You will now see all the details of your Media Services account including a top menu bar which can be used to create and control all of the Media Services entity types. For those of you that have been using Media Services for a while you’ll notice that there is now a new menu item on the top menu bar called “CHANNELS” which is marked as being preview. This is where all the management controls for Azure Media Services Channels live.
- Click on “CHANNELS” in the top menu bar. This will open a list of channels in your account (if you have any).

- Since you probably do not yet have any channels there will be a message displayed that says “You have no channels. Add one to get started!”, click “ADD NEW CHANNEL” which is immediately below it. This will open a dialog which will ask for properties you want to set on your channel.

- In the “Create a new Live Channel” dialog enter a name for your channel (in my case I’m naming it “webcast”). Next specify the ingest protocol you will use, in my case I’m using Wirecast which outputs RTMP so I’m leaving it set to the default. As far as the three checkboxes at the bottom leave “Start the new channel now” checkbox checked which will save you the extra step of starting it later. The next checkbox is labeled “Add one streaming unit” which is checked by default if your “default” Streaming Endpoint does not currently have any Streaming Units provisioned in it. If so leave it checked and we will automatically provision one for you, again saving you the extra step later. Lastly there is a checkbox labeled “Restrict video ingest to my computer’s current IP address”, if this is left checked it will apply an IP access control list (ACL) to your channel which locks it down to only accept input from your computer. Uncheck this checkbox. Below is a screenshot of my dialog with all of these settings.
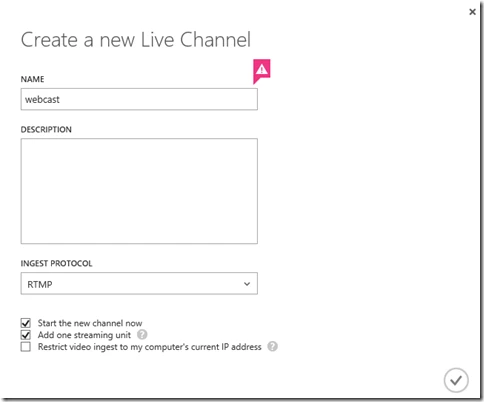
- Click on the checkmark button in the lower right corner of the “Create a new Live Channel” dialog which will trigger the new Channel to be created and started as well as a new Streaming Unit to be added to your “default” Streaming Endpoint. You’ll now see along the bottom of the screen a status strip appearing telling you that the Channel is being created and then started. Wait for these steps to complete before proceeding, it should take approximately a couple minutes.

Configuring the Encoder and Starting It
Cenk Dingiloglu has made a separate blog posting which focuses on encoder configuration, my steps below are still valid but for more detail go to https://azure.microsoft.com/blog/2014/09/18/azure-media-services-rtmp-support-and-live-encoders/
Now that we have the infrastructure needed in Media Services the next step is to setup Wirecast and start pushing the stream at our channel. Telestream is currently finalizing a “Destination” for Azure Media Services which will shorten the steps needed but since that is not yet widely available I’ll walk through all the manual steps, to speed thing up somewhat I have created a Wirecast “document” which will give you most of what you need. I won’t go into the detail of how this document was created, later this week there will be another post from Cenk Dingiloglu that will go into much more detail on encoders.
- Download my Wirecast document from
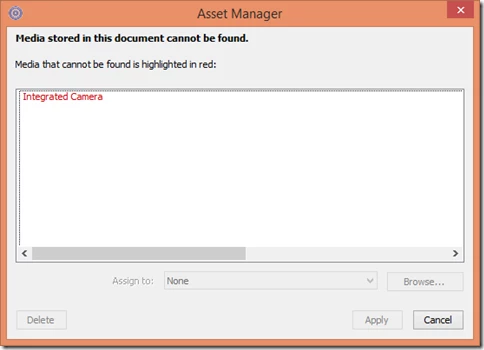
- Open Wirecast and open the document you just downloaded. You will most likely get an error like the one below telling you that Wirecast can’t find media described in the document. Go ahead and click “Cancel”, this is displayed because you don’t have the same camera device that I was using when I set it up. We’ll take care of that next.
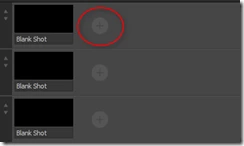
- In the Wirecast UI we’ll now add your camera source. Towards the bottom of the UI there are three rows of sources, hover your mouse of the “+” in the first row and then click the camera icon. After you do that you’ll get a list of cameras currently connected to your PC, make the selection that makes sense to build your sample. When done you should now see a new source listed on that row and it should show a live feed from the camera.
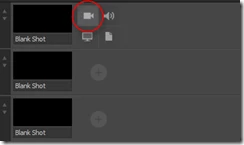
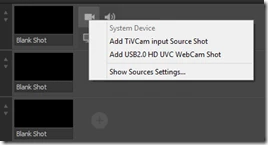
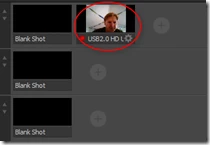
- Now click on the “Output” menu in Wirecast and select “Output Settings..”. Since you are using the document I created you should now see a dialog which looks like the following. It is setup to encode the stream into three quality levels of 400, 600, and 900Kbps. The 400Kbps quality level is encoded using H.264 Baseline profile to support older Android devices and the 600 and 900Kbps quality levels are encoded using Main profile which will provide a higher level of quality. The only thing that is missing is the destination “Address” for where to push the streams which we’ll fill in next.
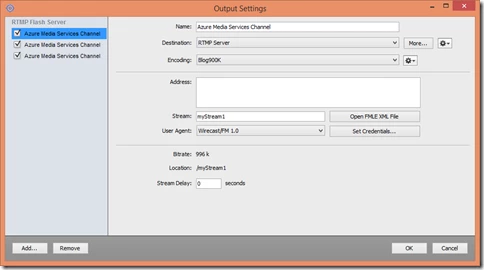
- Move back to the Azure management portal and find your channel in the channel listing. Hover your mouse over the “INGEST URL” column and click the copy icon to the right. This will copy the ingest URL for your channel to the clipboard.

- Move back to Wirecast and the “Output Settings” dialog then paste the ingest URL of your channel into the “Address” textbox. You need to repeat this for all three quality levels that are being encoded. So in other words make sure you click on each “RTMP Flash Server” on the left of the dialog and set the address for each one.
- Click the “Ok” button on the “Output Settings” dialog.
- Click on the camera source you created back in step 3 which should move it into the “Preview” section of the UI.
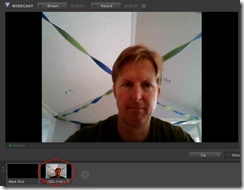
- Next click the “—>” button to move the “Preview” over to “Live” at which point you should see your camera source in both of the spots at the top of the UI.

- At this point Wirecast should be all configured so the only remaining step to start pushing your stream to your Azure Media Services Channel is to push the “Stream” button in the top left corner of the Wirecast UI. If everything goes well a red dot will appear on the button letting you know that you’re now on-air.

- You can now check that the stream is being received properly by viewing it from the preview publishing point on the Channel which gives you a direct view on what it is receiving. Move back the the Azure management portal and click on the “PLAY” command in the bottom command strip. A list of subcommands will then appear and click on “Play Preview URL” which will open a video player within the portal and connect it to the preview URL on your Channel.
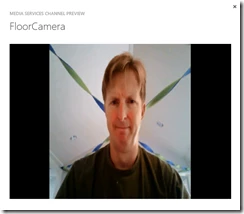
NOTE: If for any reason you stop the encoder and then need to restart it you should first reset the channel by clicking the “RESET” command in the Azure management portal.
Starting the Event and Playing the Stream
Now that we have the stream flowing into your Channel we can begin our event by creating an Asset, Program, and Streaming Locator to archive the stream and make it available to viewers through the Streaming Endpoint. To do this we’ll use a shortcut in the portal that does all of these in a single step.
Creating and Starting a Program
- Move back to the Azure management portal and back into the “CHANNELS” section if you’re not there already. If you have multiple channels in your account make sure the channel you setup above is selected (highlighted in blue). In the command strip at the bottom of the page click on “START STREAMING” and then in the confirmation that appears click “YES”. Once the command has completed the “PUBLISH URL” column will be filled in with a URL you can use top pull your stream from your Streaming Endpoint.

Playing the Live Stream
Now that the live stream is being pushed into an Asset it is available to be pulled out of the Streaming Endpoint and can be dynamically packaged into all of our currently supported protocols (MPEG-DASH, HLS version 3, HLS version 4, HDS, and Smooth Streaming). We’ll take advantage of these capabilities by playing back the stream in a desktop browser using a Flash control with Smooth and on iOS and Android devices with HLS version 3.
- In the Azure management portal hover your mouse over the “PUBLISH URL” for your Channel and click on the copy icon which will copy the URL to your clipboard.
- Paste the publish URL into your favorite text editor, it will look something like “https://.origin.mediaservices.windows.net//.ism/manifest”, that is the Smooth Streaming URL. Paste it in again and then append “(format=mpd-time-csf)” this will tell the Streaming Endpoint to package the stream into MPEG-DASH. Paste it in one more time and this time append “(format=m3u8-aapl-v3)” which will tell the Streaming Endpoint to package the stream into HLS version 3.
- On a Windows PC or Mac (You will need a browser that supports Media Source Extensions, such as the latest version of Internet Explorer or Chrome) navigate to https://aka.ms/dashplayer this is a sample DASH.js video player that I built that you can use for testing your stream. Paste the DASH URL into the textbox at the top and then click “Load”. You can repeat this on an Android device and Windows Phone.
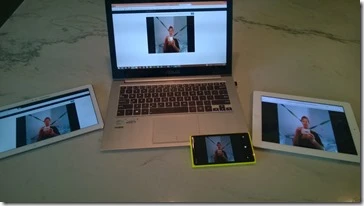
NOTE: My sample DASH player also can take the DASH URL as a query parameter on the URL, in other words you can construct a URL like the following to distribute to each device. https://dashplayer.azurewebsites.net/?URL=https://.origin.mediaservices.windows.net/../…ism/manifest(format=mpd-time-csf) - On an iOS device open Safari and enter the HLS version 3 URL in the address bar. Entering it in the address bar is shortcut for getting the native player to play the stream, you could also create an HTML5 page with a video tag and give it the HLS URL as its source or build a native application as well.
Stopping the Event
To end your event you need to stop the Program which will cause it to stop pushing the stream into your asset. This a simple one step operation.
- Back in the Azure management portal select your channel then click on the “STOP STREAMING” command in the bottom command strip and then “YES” on the confirmation that appears. This will stop the Program you have running on that channel and then will delete it.

One of the great features of our live services is our seamless/instant transition of assets from live to on-demand. If you now go back and play the stream on one of your video players you’ll find that the stream is still available using the same URL but is now on-demand rather than live.
Cleaning Up
You can leave everything running as it is if you want to run another event. To do that all you need to do is start a new program on the Channel as we did above. However if you are done you can now tear down some or all of the infrastructure you provisioned above.
- First off the encoder, push the “Stream” button in Wirecast to stop pushing the stream and then you can close the application.
- The Channel can now be stopped as well. In the Azure management portal select the Channel again (if it isn’t already) and then click the “STOP” command in the bottom command strip. When done the Channel will be in a “Stopped” state which means it is not consuming any resources so you can leave the Channel in this state indefinitely and it will not incur any charges. When you want to use it again you will click the “START” command and it will re-hydrate and have the same ingest URL so there won’t be any need to reconfigure your encoder.
- Lastly the Streaming Endpoint. If you want to continue to provide the archive of your live event as an on-demand stream you will need to leave your Streaming Endpoint running but if you are done streaming it as well you can move to the “STREAMING ENDPOINTS” tab within the management portal, select your Streaming Endpoint which is probably called “default” and then click the “STOP” command in the bottom command strip.
Conclusion and What’s Next
In the blog post above we have gone through the steps needed for a code-less setup, execution, and tear down (if desired) of a live event using the Azure management portal. In the coming days we’ll make more postings covering the list of RTMP encoders we have tested with and how to set them up, how to setup and run live events using our SDK, applying content security to live streams, and running linear streams.